Closing the books
"Closing the books" in TRES is the process of finalizing your crypto financial data for a specific period so it can be accurately synced to your ERP and locked for reporting.
Phase 1: Data Verification (The "Health Check")
Before you begin accounting work, ensure TRES has seen all the data.
1. Check Data Freshness
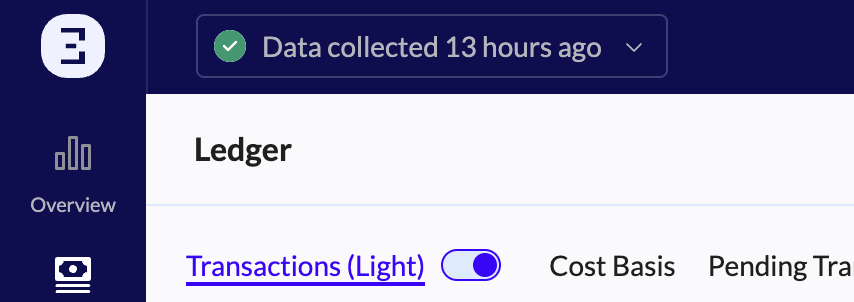
Action: Look at the "Data collected..." badge in the top-left corner of any page.
Goal: Ensure the status is "COMPLETED" or "Data collected X minutes ago" to confirm all recent transactions have been fetched.
2. Verify Wallet Connections
Action: Go to the Accounts page.
Goal: Ensure no wallets are showing connection errors. If a wallet is disconnected, TRES cannot see new transactions, making your books incomplete.
Phase 2: Reconciliation (The Core Step)
This is the most critical step. You must prove that the TRES Ledger matches the actual blockchain balance.
1. Identify Unbalanced Assets
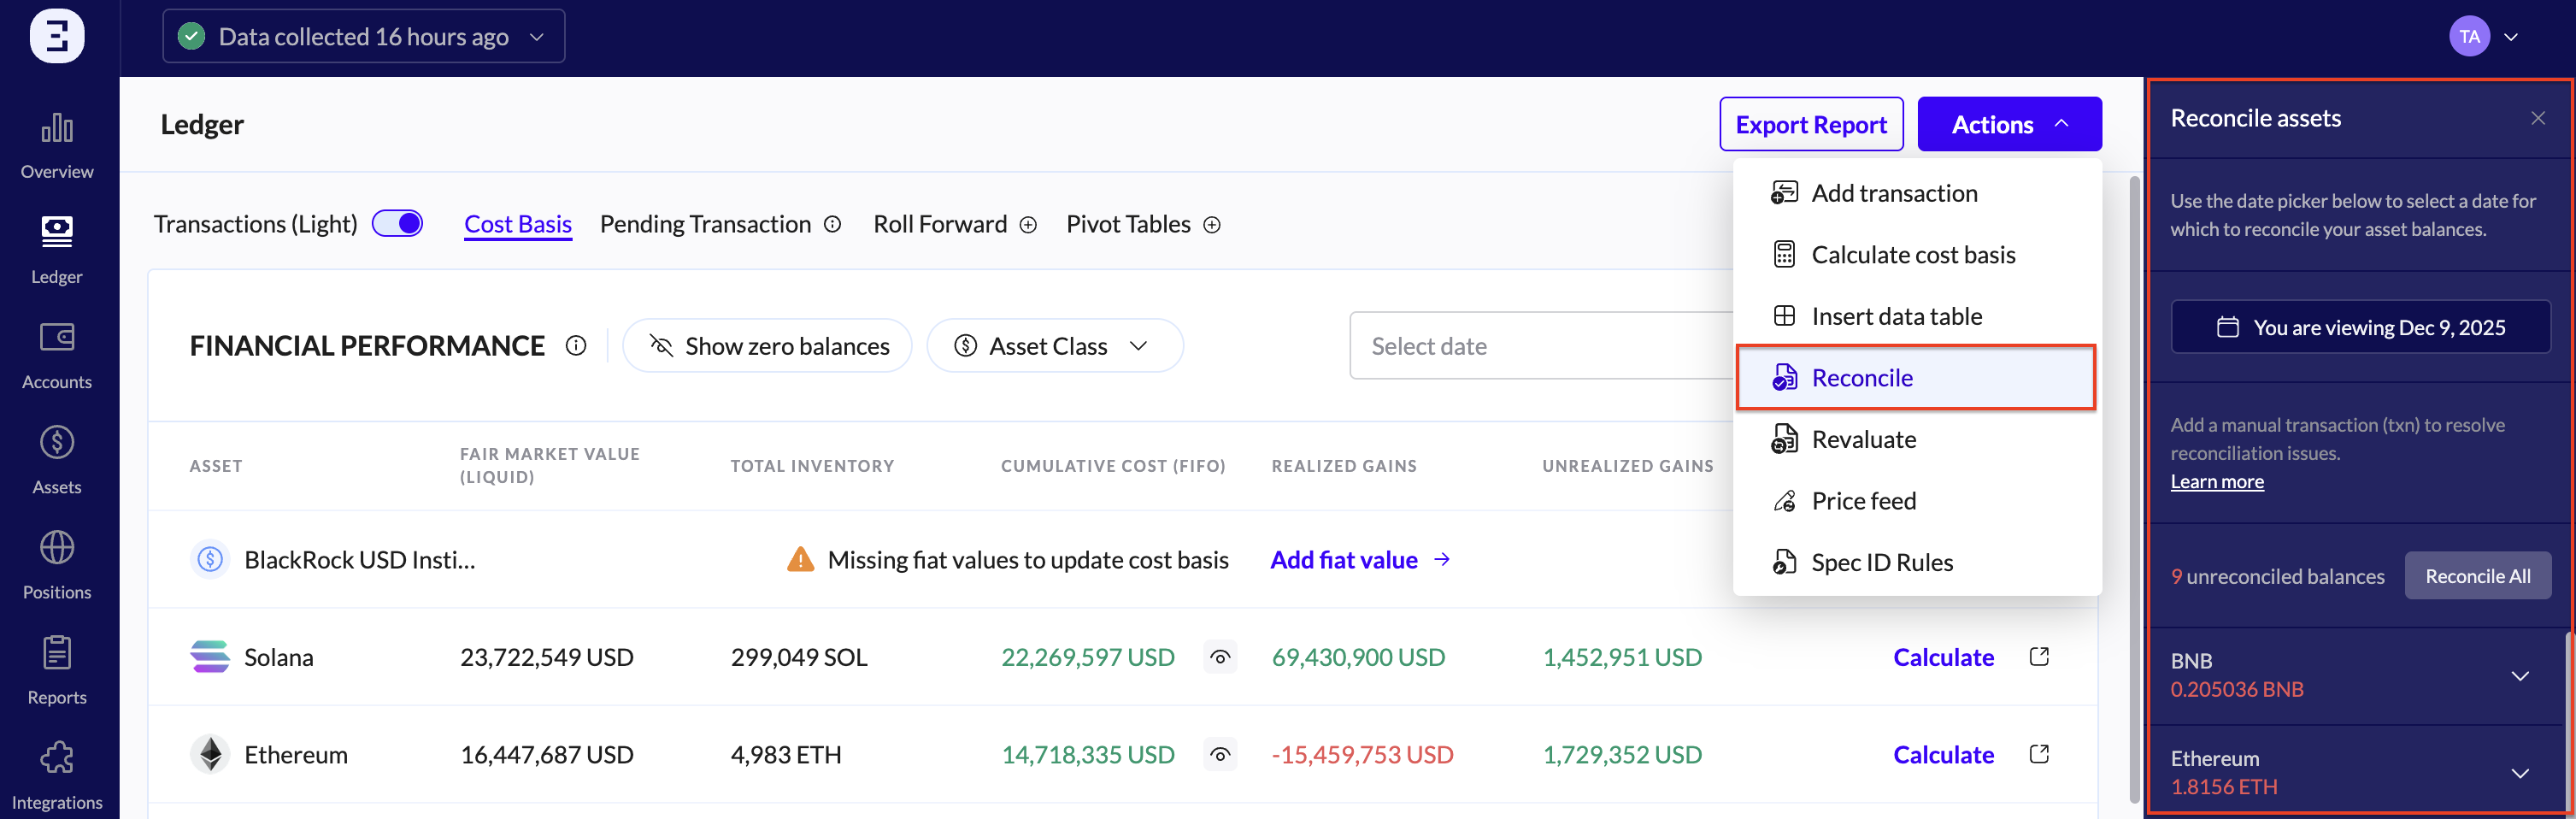
Action: Go to the Ledger page.
Open the Reconcile side-panel from the Actions menu.
2. Close Reconciliation Gaps
For every "Unbalanced" asset, you must find the missing data.
Action: Choose how to close the gaps:
Manual Transactions: Use the "Reconcile all" or "Reconcile" (for specific asset) feature to create a manual entry that fills the gap.
Automate reconciliation gaps filler: Visit this guide
Spam: If the discrepancy is due to a spam token, mark the asset as SPAM to remove it from your books.
Phase 3: Classification & Valuation
Ensure every transaction has a price and a category.
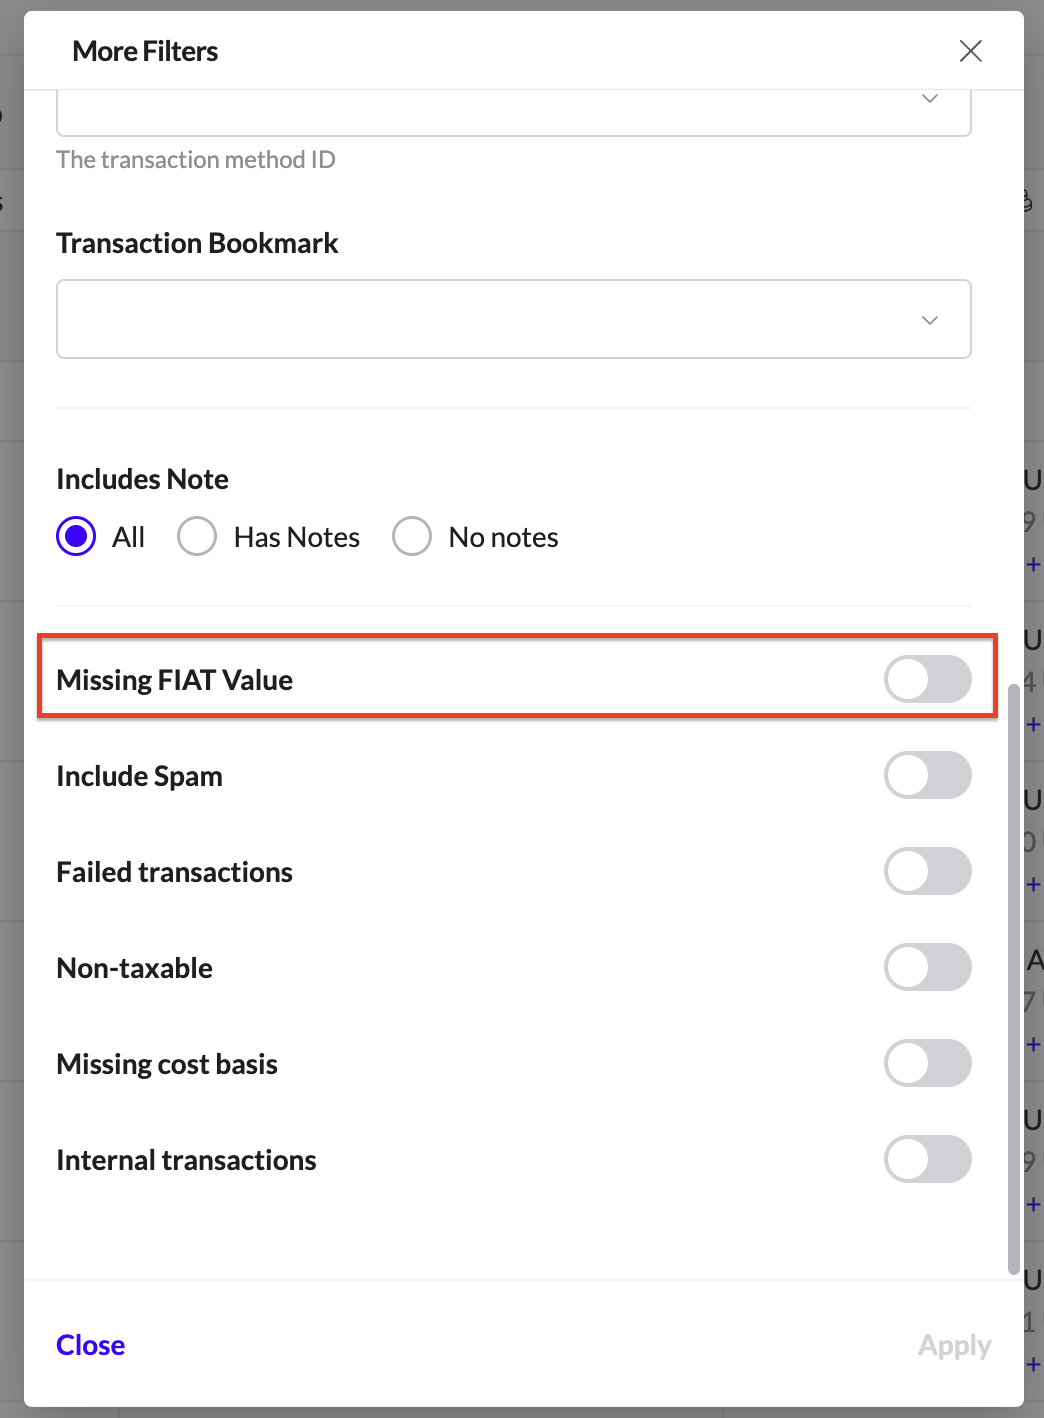
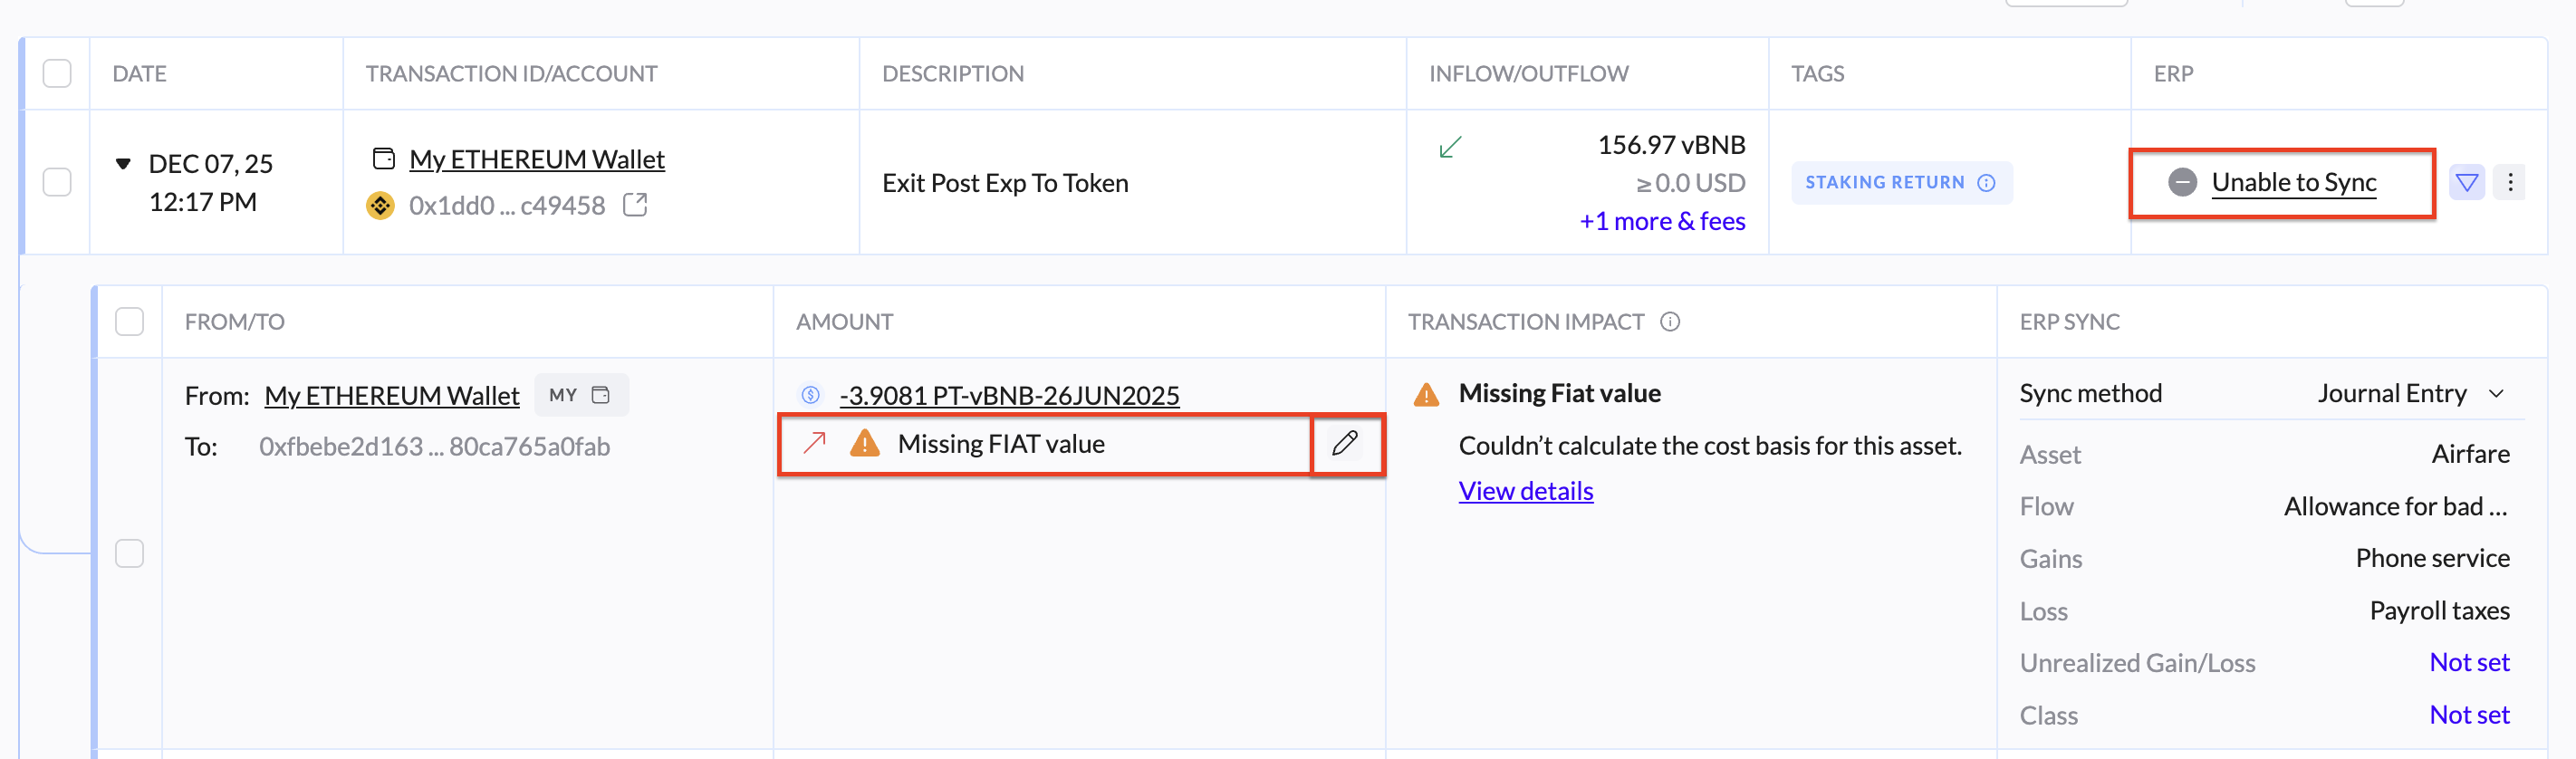
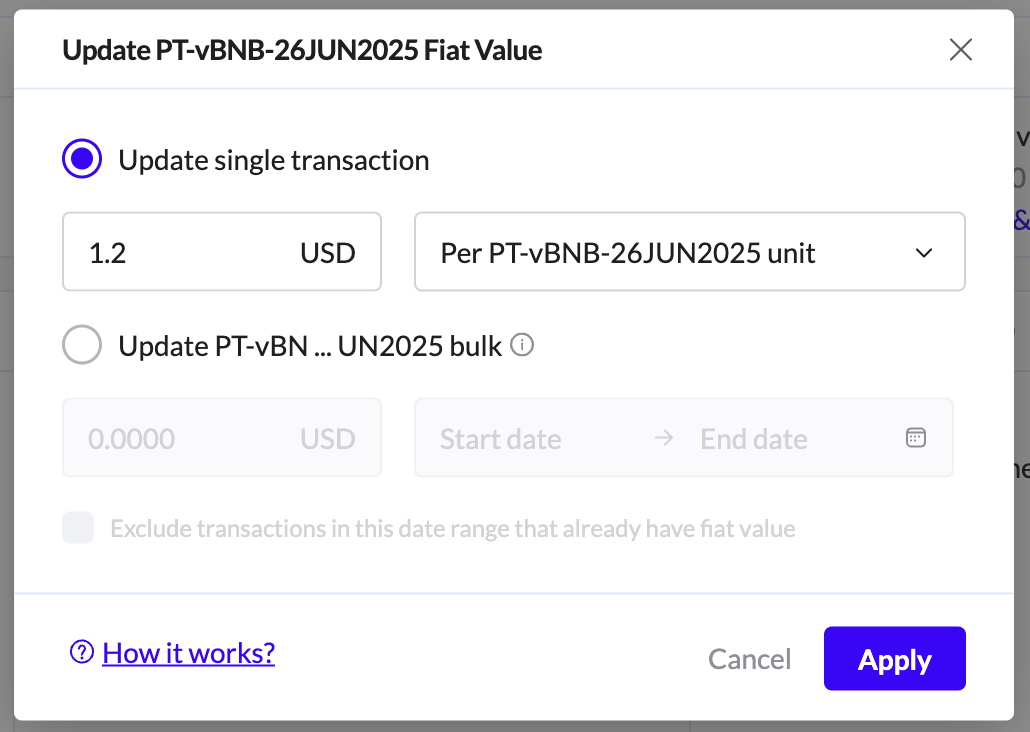
1. Fix Missing Fiat Values
Transactions with no USD value cannot be posted to your ERP.
Action: Go to the Ledger page and use the filter "Missing FIAT value".
Fix: Click the Edit icon on these transactions to manually assign a USD price (e.g., for a niche token that had no price feed at the time of the transaction).

2. Review Cost Basis
Action: Go to the Overview/Ledger page --> Cost Basis tab.
Goal: Check for any calculation errors. If TRES cannot calculate the cost basis, you will see an error. You must resolve these for your Realized Gains/Losses to be accurate.
3. Categorize Transactions (Tags)
Action: Ensure all transactions for the month have the correct Tags (e.g., "Revenue", "Expense", "Payroll").
Tip: Use Automations to apply these tags automatically if you haven't already.
Phase 4: Sync to ERP (The "Close")
Once TRES data is perfect, push it to your accounting system of record.
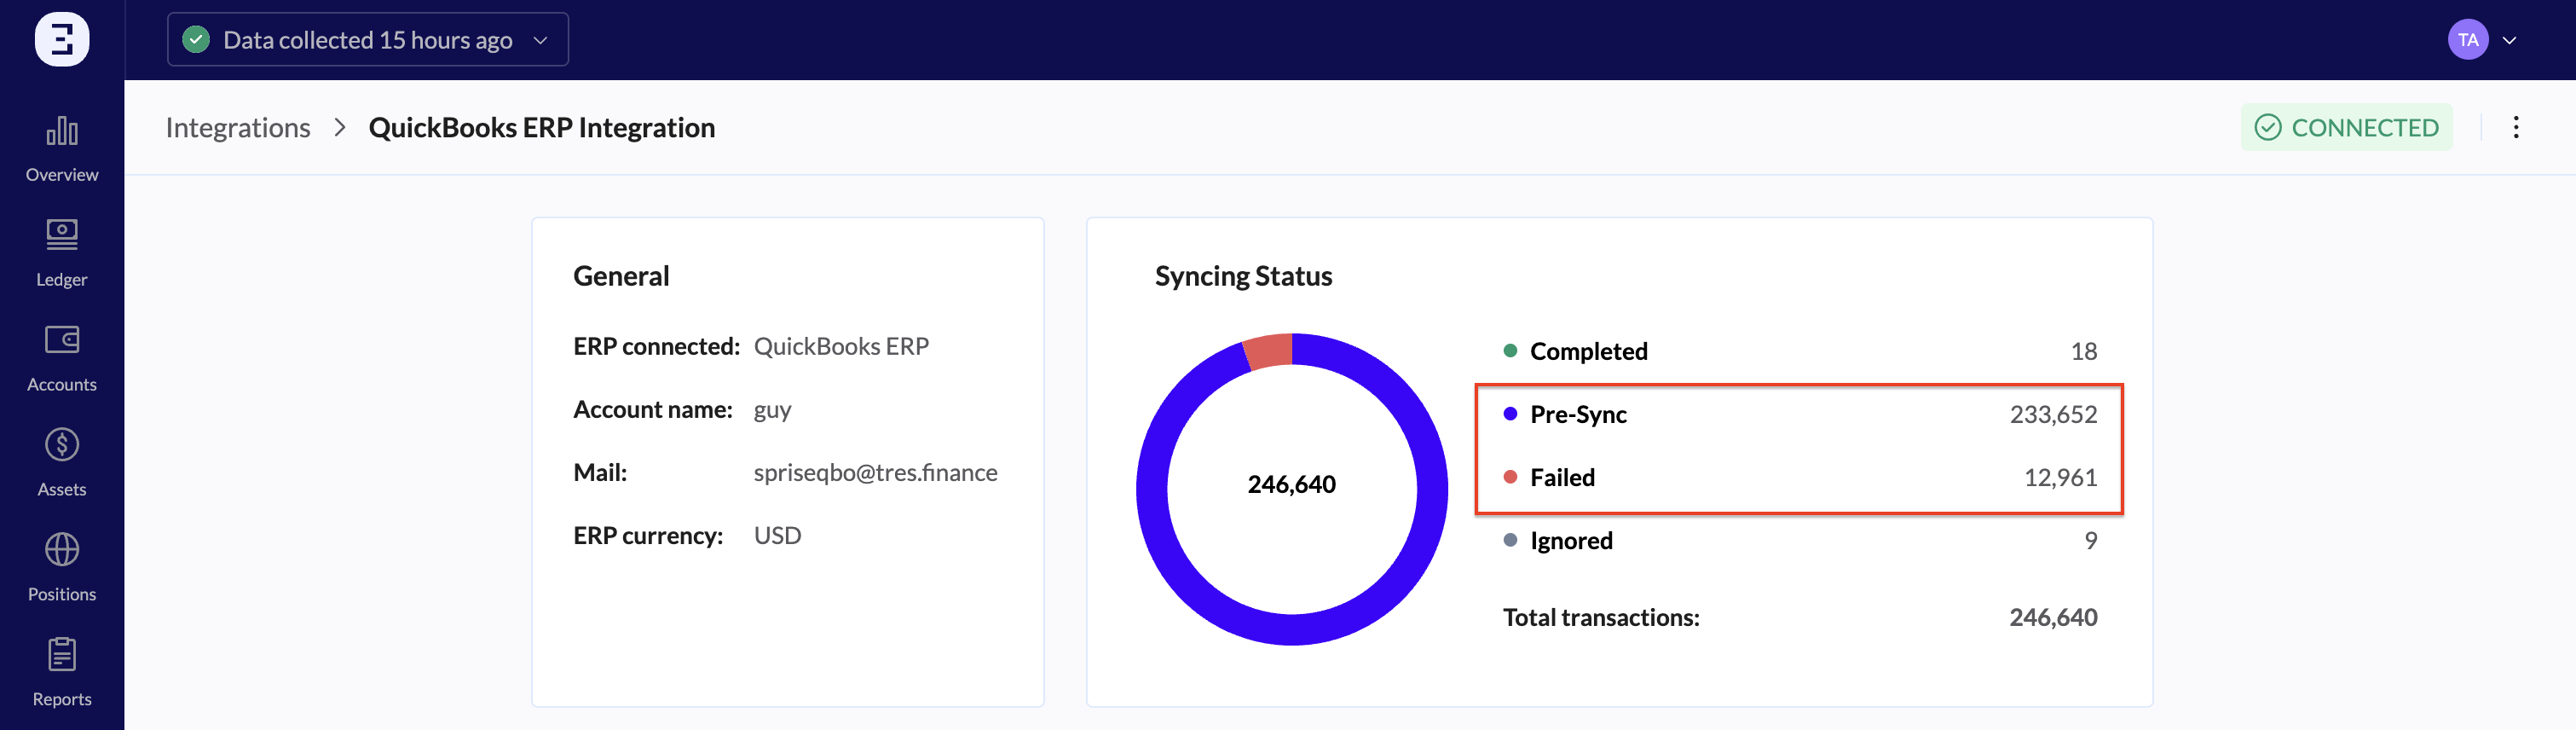
1. Review Pre-Sync Status
Action: Go to Integrations --> Connected ERP (View Configuration).
Check: Look at the Syncing Status widget.
Pre-Sync: These are the transactions ready to go. Review them to ensure they map to the correct Chart of Accounts.
Failed: Resolve any transactions in the "Failed" bucket (usually due to a mapping error).
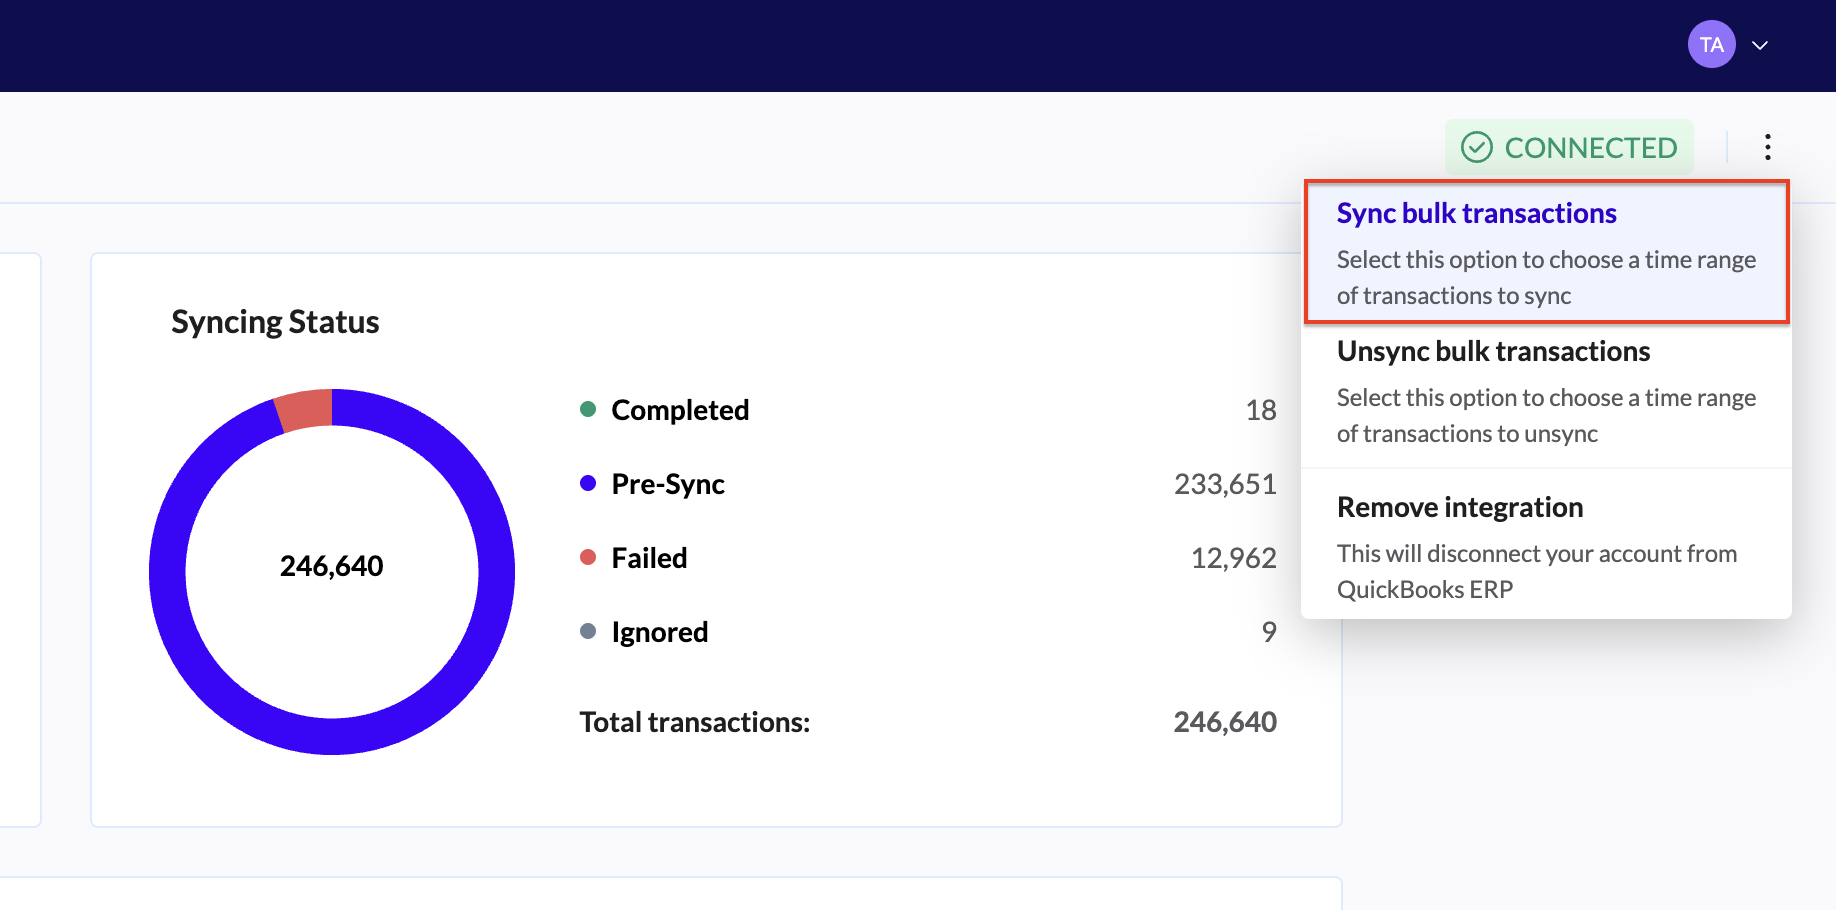
2. Trigger the Sync
Action: Sync your transactions.
Click "Sync bulk transactions" from the 3 dots menu.
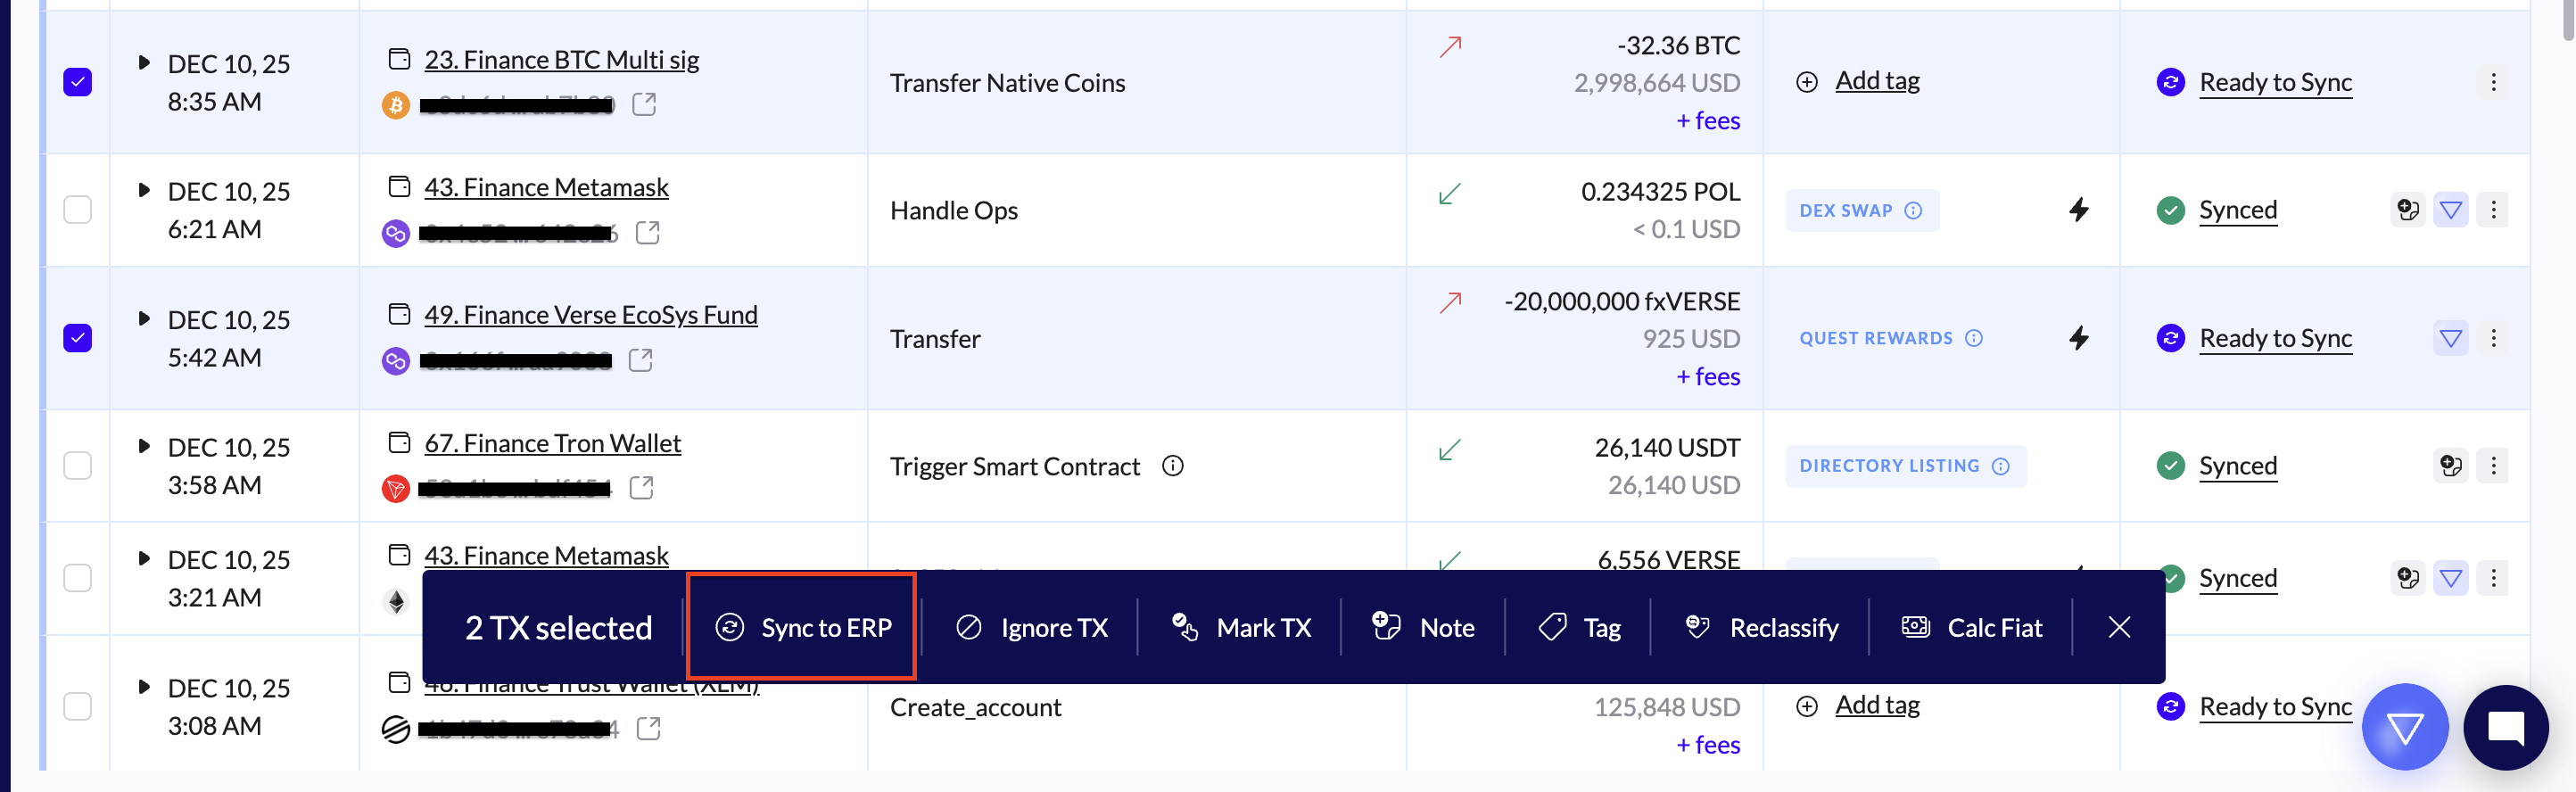
Sync specific transactions from the Ledger.
Verification: Watch the transactions move from Pre-Sync to Completed.
Phase 5: Finalization
1. Generate Month-End Reports
Action: Go to the Reports page.
Recommended Reports:
Transaction Ledger: For a full detailed backup.
Balance Trends: To prove your ending balances matches the bank/blockchain.
Cost Basis / Realized Gains: For tax reporting.
2. Lock the Period (External)
Action: Go to your ERP (QuickBooks, NetSuite, Xero).
Final Step: Once the TRES data is in, "Close the Books" inside your ERP by setting a Closing Date. This prevents any changes to the data you just synced.