Set up TRES for Accounting
Your onboarding checklist for using TRES as your crypto accounting platform.
If your organization plans to use TRES for accounting, this article is your starting point. It walks you through the full setup — from confirming your wallets are connected and reconciled, through validating data quality, configuring your ERP integration, and syncing transactions to your accounting software.
Follow these steps in order. Each phase builds on the previous one, and skipping a step (for example, syncing before fiat values are complete) can lead to errors that delay your month-end close.
Before You Begin
These procedures are part of the standard onboarding flow. Make sure you've already completed the basic setup of your TRES account — your account should be fully activated and your core policies (cost basis method, reporting currency, etc.) should be in place. Learn more.
Setup Phases
Here are the phases for setting up TRES for accounting:
Confirm wallets are displayed and reconciled
Verify that all transactions have a fiat value
(Staking only) Mark taxable transactions
Verify that cost basis is being calculated
Configure and enrich your data
ERP configuration
Create rules to link transactions to your chart of accounts
Inspect the Pre-Sync report
Sync transactions
Final validation (Post-Sync report)
1. Confirm Wallets Are Displayed and Reconciled
This step has two parts: first confirm that all your wallets are visible in TRES, then confirm that the assets within those wallets are reconciled.
A. Confirm all wallets appear
Go to Accounts → My Wallets and confirm that all of your organization's wallets are reflected there — including blockchain wallets, exchange connections, and custodian connections.
If a wallet is missing, follow the steps in Add Wallets to TRES to add it.
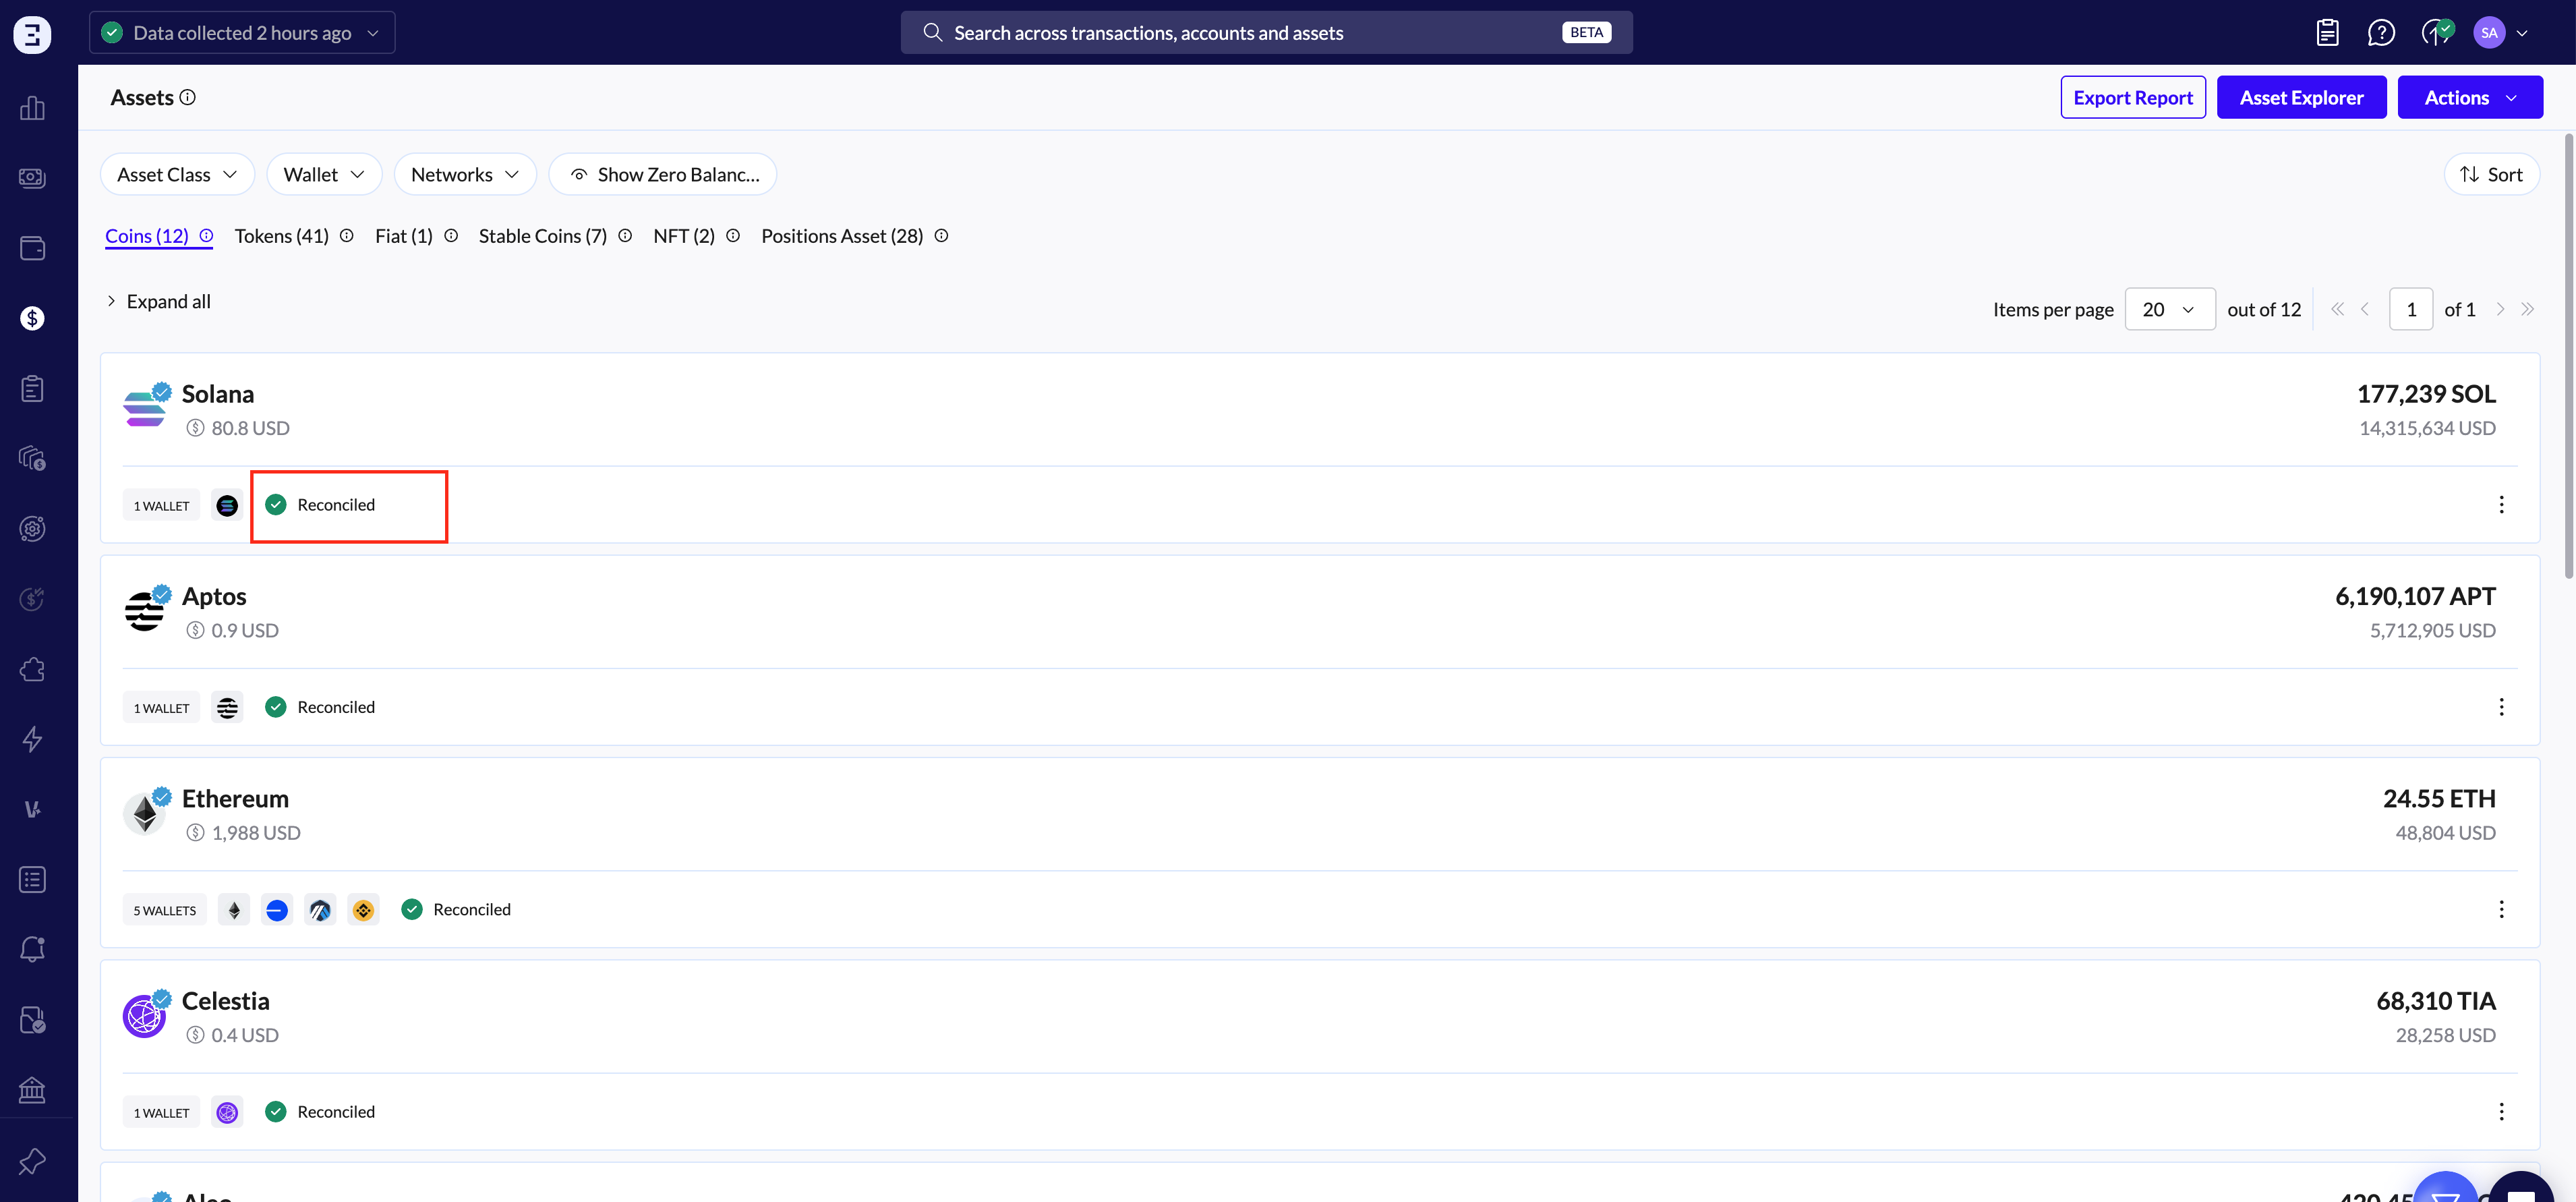
B. Confirm assets are reconciled
Reconciliation compares the transactions collected by TRES against the blockchain, exchange, or custodian balance to confirm they match and to surface any discrepancies.
Go to the Assets page.
Look for the Reconciled or Unbalanced status next to each asset.
Use the filters at the top to narrow your view by Asset Class, Wallet, or Networks.
Expand a specific asset to see two tabs: Overview and Wallet Breakdown.
In the Wallet Breakdown tab, use the filter icon on the right side of the Current Balance column to filter by Reconciled or Unbalanced. This makes it easy to spot which wallets/networks need attention.
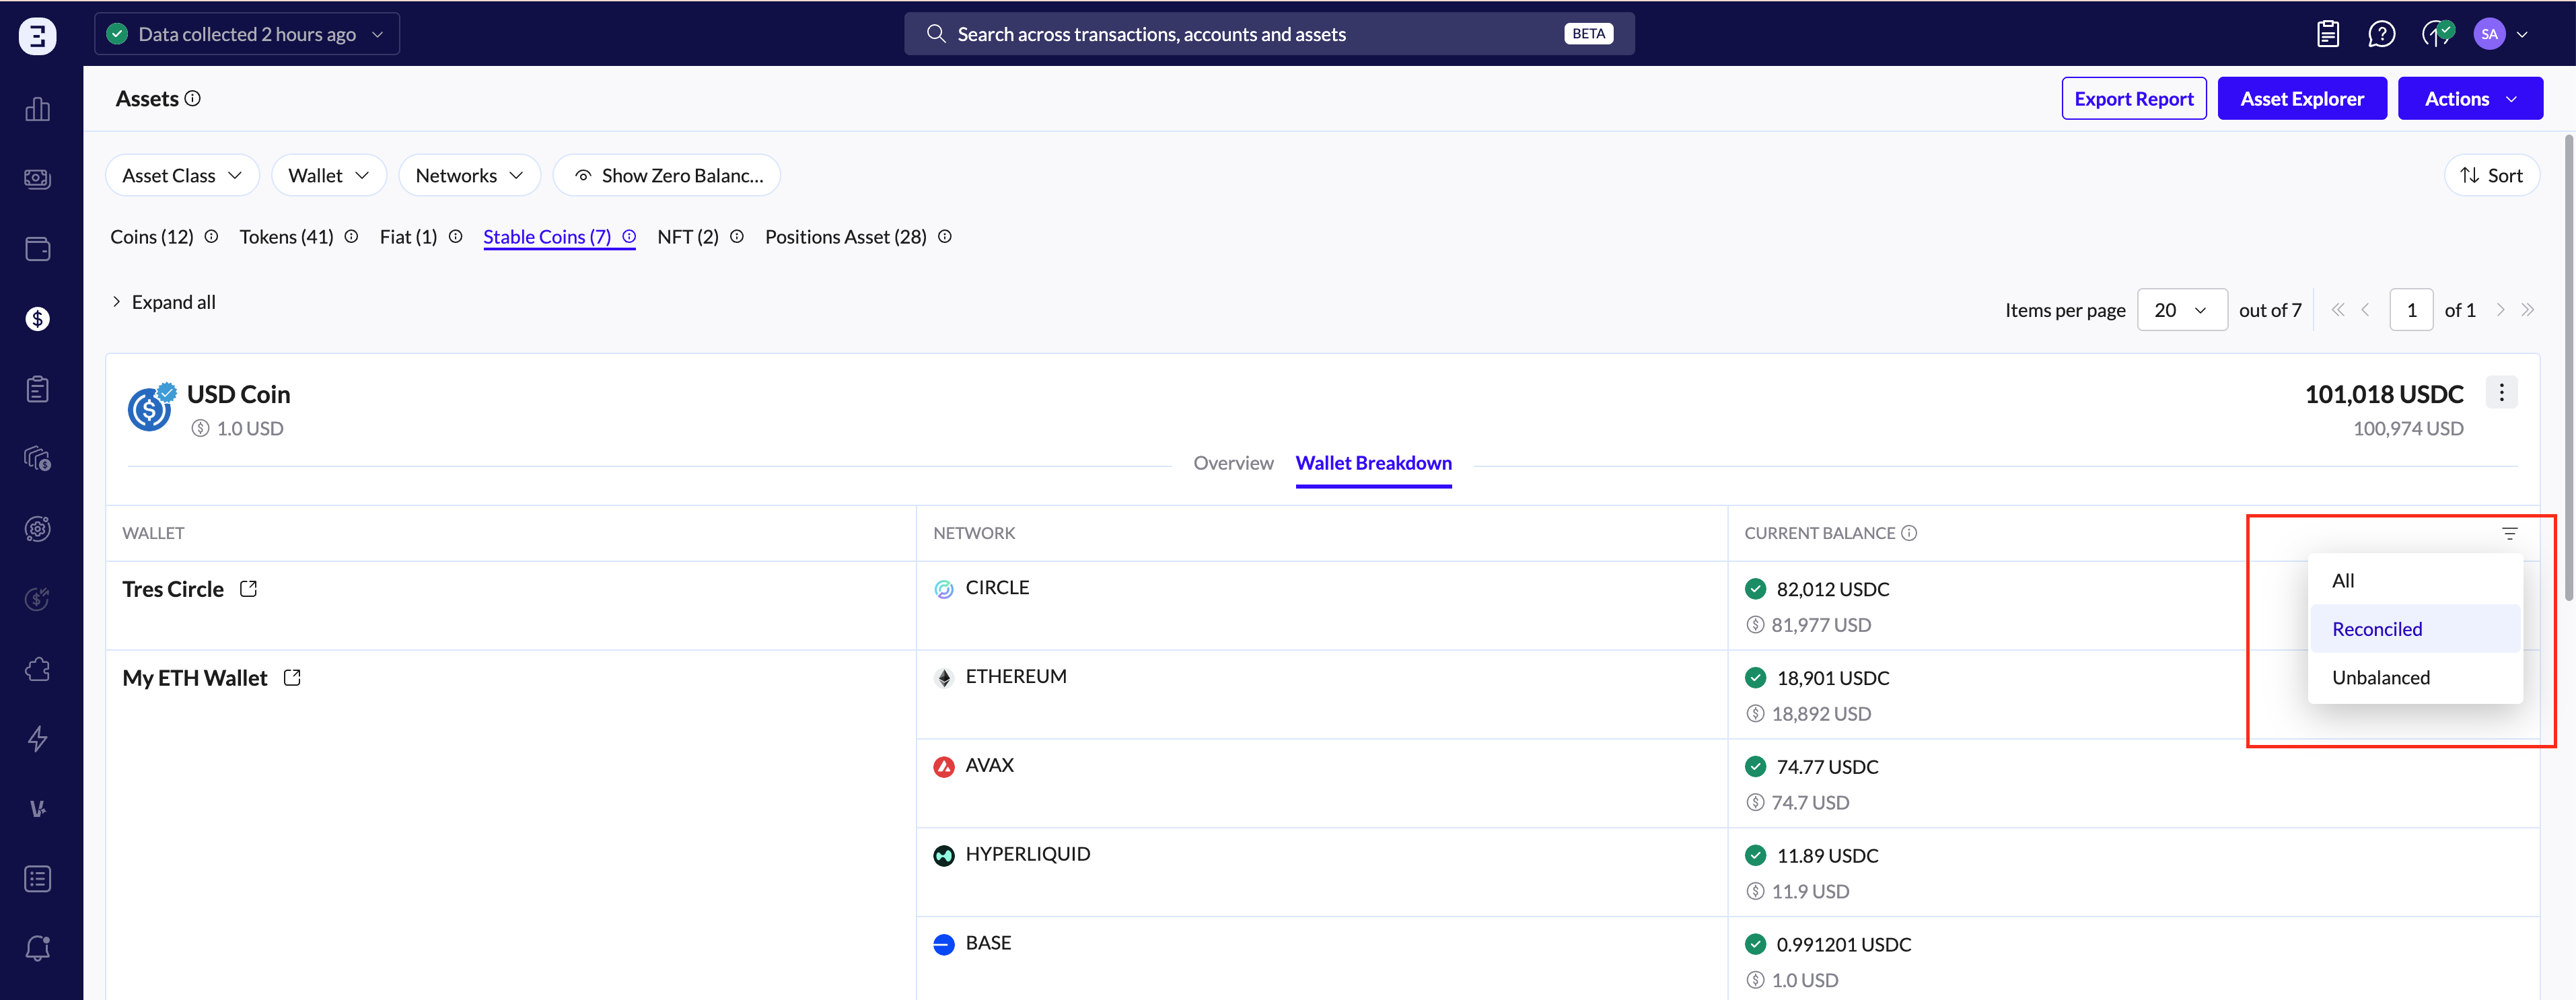
To resolve any unbalanced wallets, follow the steps in Close Reconciliation Gaps in TRES, or contact our Support team for guidance on resolving a specific gap.
2. Verify That All Transactions Have a Fiat Value
Every transaction needs a fiat value to support P&L and cost basis calculations.
Important: Because cost-basis calculations are linked, a single transaction missing a fiat value will affect all calculations for that asset — past and future — until the issue is resolved.
Common reasons a transaction might be missing a fiat value:
The asset was not yet listed on public markets (e.g., CoinGecko or CoinMarketCap) on the transaction date — for example, transactions from 2024 for an asset that only began trading in 2025.
The asset is not yet supported for automated pricing (no Verified badge).
The asset is an NFT, which requires a manual valuation.
A SWAP has occurred and prices need to be aligned to close the gap.
The asset has been flagged as Spam, which prevents pricing updates.
How to identify and resolve missing fiat values:
In the Ledger, click More Filters, toggle Missing Fiat Value, and click Apply to surface all affected transactions.
For full step-by-step instructions on resolving these errors — including the Quick Fix (Calculate Fiat Value), manual entry via the pencil icon, bulk update using the Fiat Config tool — see Resolve "Missing Fiat Value" Errors.
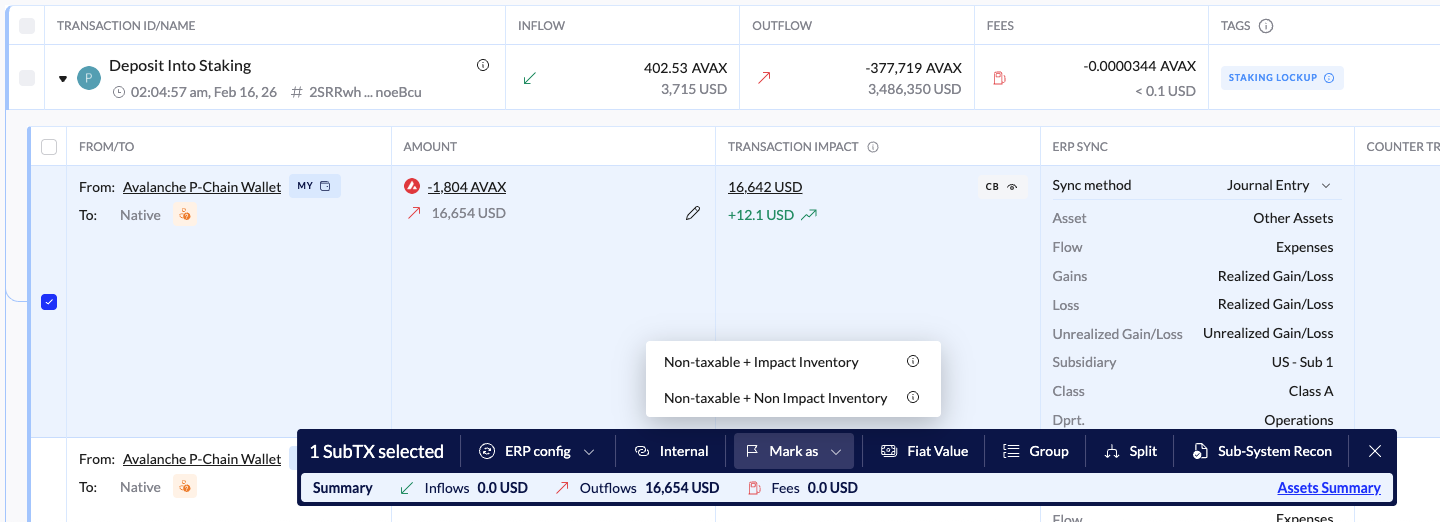
3. (Staking Only) Mark Taxable Transactions
Staking transactions may or may not be taxable, and may or may not impact cost basis, depending on your jurisdiction's tax and accounting rules. Mark non-taxable transactions before running reconciliation.
From the sidebar, click Ledger.
Apply a filter to display transactions with tag such as Staking Lockup and Staking Return. (Tip: you may first need to identify and tag these transactions correctly.)
Select one or more sub-transactions and choose Mark as from the pop-up menu.
Choose either Non-taxable + Impact Inventory or Non-taxable + Non Impact Inventory, depending on your situation.
This article Setting Sub-transactions as Non-taxable contains additional information on marking transactions.
💡 You can also automate this classification by creating automations for tagging (see this article) so future staking transactions are handled for you.
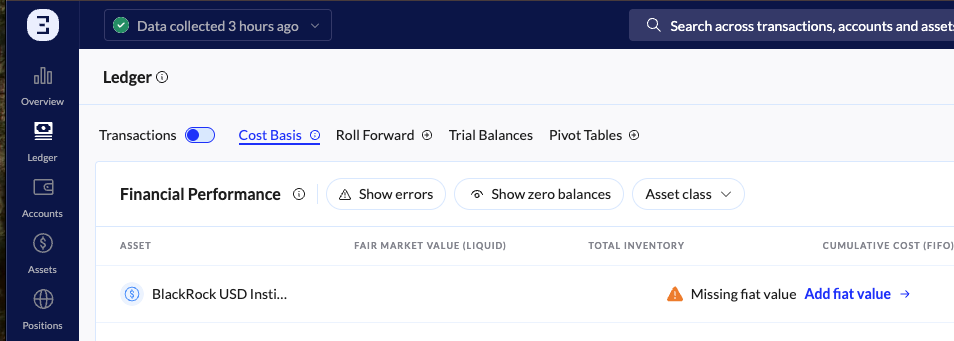
4. Verify That Cost Basis Is Being Calculated
Open the Cost Basis tab on the Ledger page (also accessible from the Overview page).
Inspect the data for each asset:
A correctly calculated asset will show no errors.
An error like "Missing fiat value" indicates a fix is needed — click the blue link in the error to jump straight to the affected transactions.
Use the Show Errors filter to display only assets with cost-basis errors.
If you still need help resolving cost-basis issues, reach out to the TRES Support team.

5. Configure and Enrich Your Data
Improve bookkeeping quality by adding context to your raw data. TRES gives you several tools to do this:
Customized Tags — create tags such as Revenue, Salary or Treasury for both transactions and wallets, then use them in automated rules. For details, see the Tags & Groups article.
Contacts — label third-party wallet addresses to give them context and use them as a condition for rules. For details, see the Accounts article.
Notes — add short notes to specific transactions to explain what happened. Notes sync to journal entries in your ERP. For details, see the ERP Integrations article.
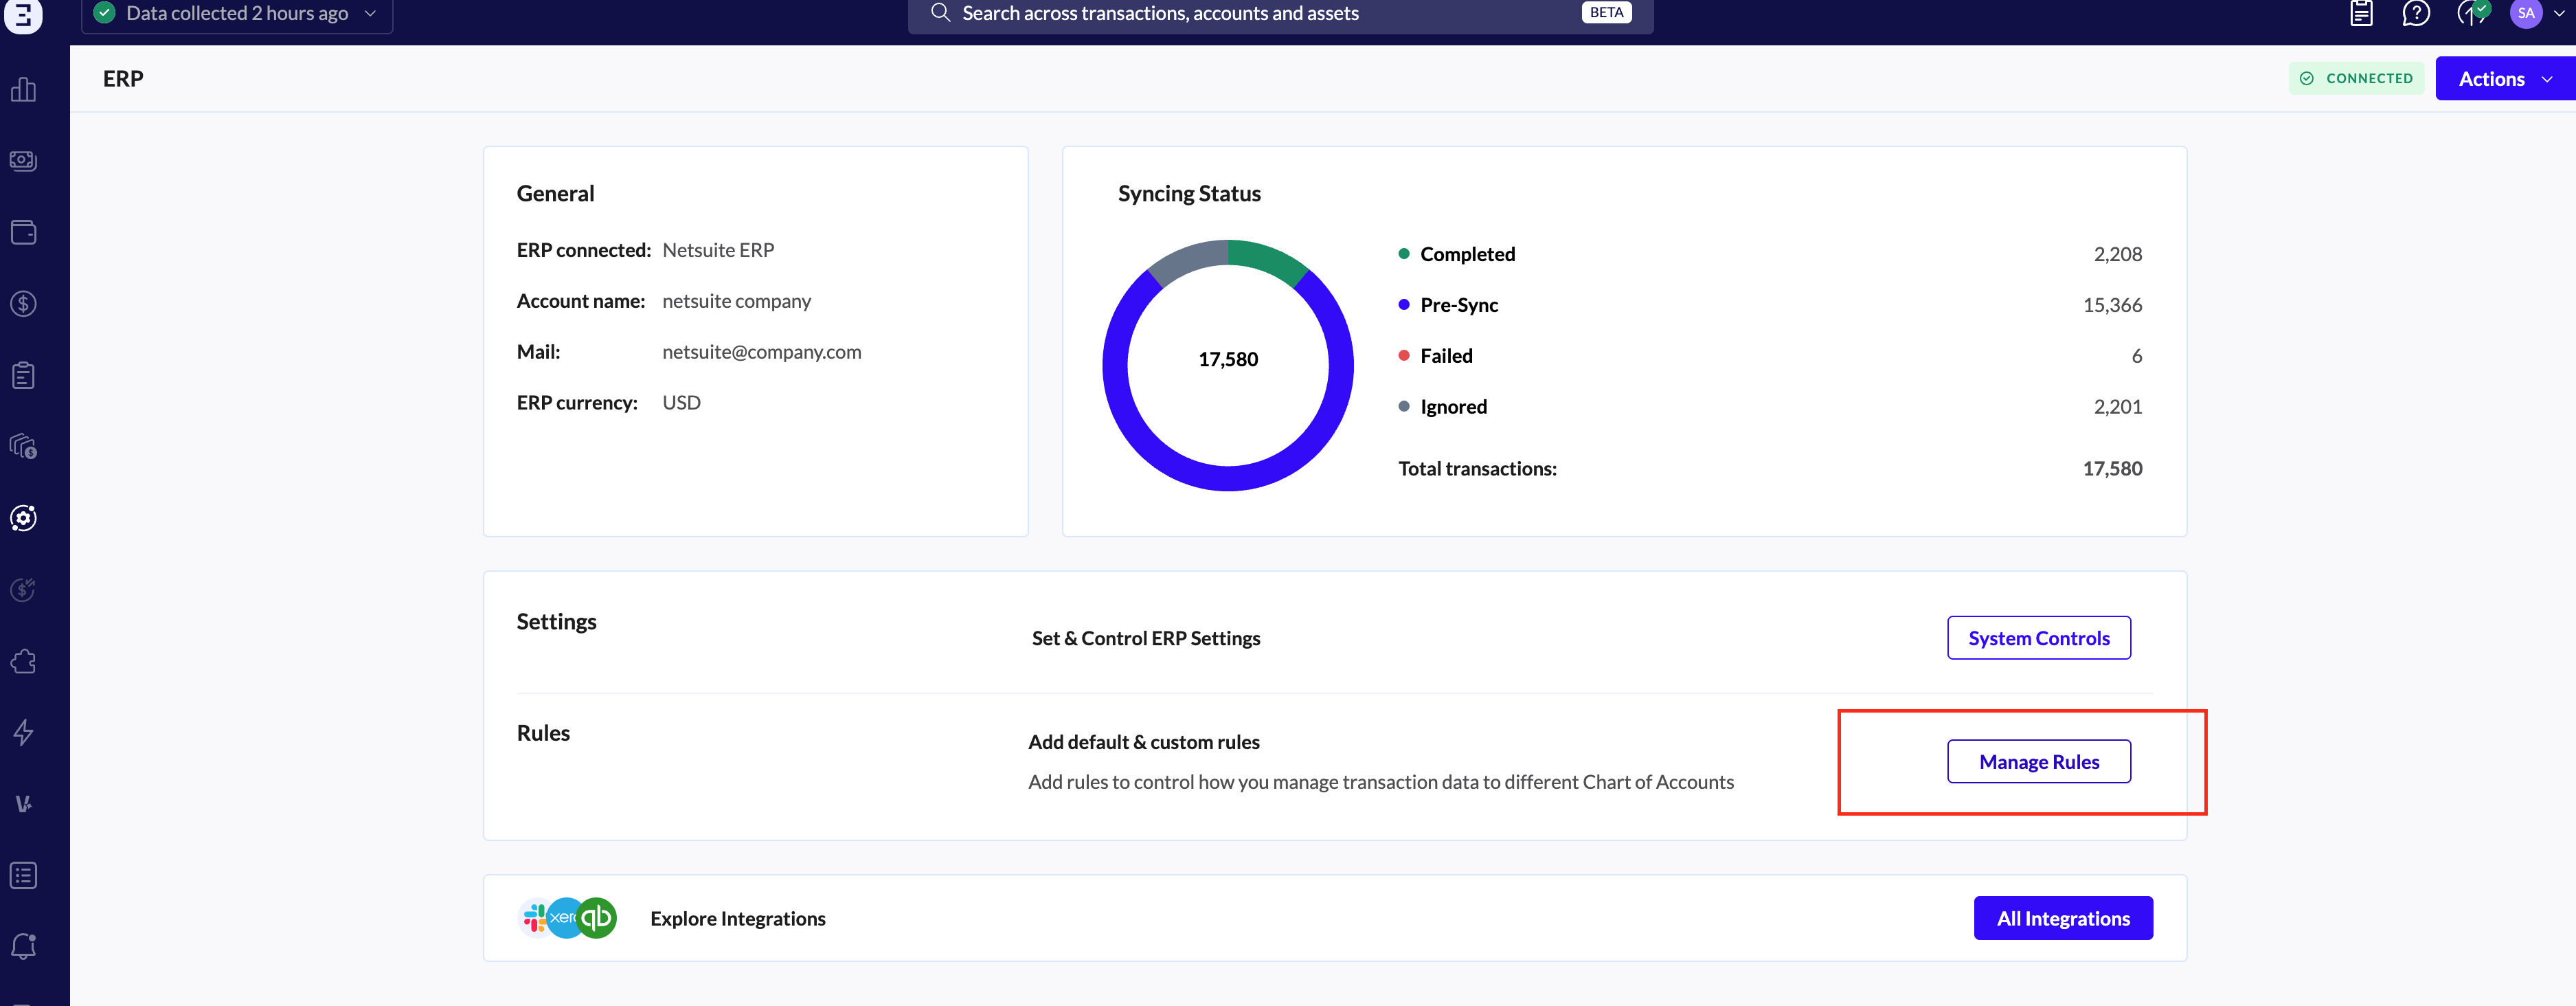
6. ERP configuration
Connect your ERP directly to TRES, or use Universal ERP to upload your Chart of Accounts. See the ERP Integrations article for more details.
7. Create Rules to Link Transactions to Your Chart of Accounts
Custom rules automate transaction classification across your ERP.
In the ERP page - go to Manage rules.
When: Define the conditions that trigger the rule — wallets, assets, contacts, networks, transaction tags, or contracts. Combine multiple filters for specificity.
Then: Decide how matching transactions should be classified in your ERP. Assign them to specific accounts for Assets, Income, Expenses, or Gains and Losses.
Examples:
When the asset is USDC, sync the transaction to the USDC Asset Account.
When the contact is Payroll Wallet, classify it under Salaries Expense.
Build as many rules as needed. A complete, well-structured rule set keeps your data consistent and policy compliant.
For step-by-step instructions, see Define Custom Rules to Automate Transaction Classification.
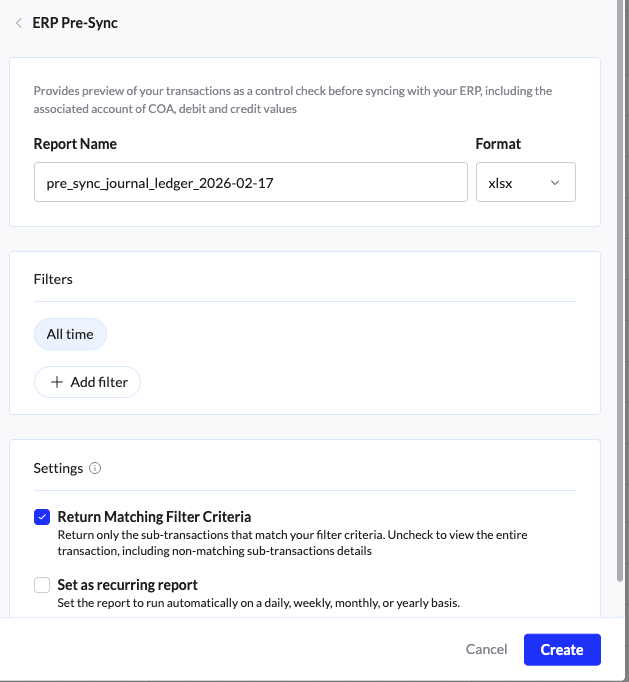
8. Inspect the Pre-Sync Report
The Pre-Sync report confirms your data is complete and correctly structured before syncing to your ERP. It verifies that:
Every transaction is mapped to the correct Chart of Accounts.
All transactions have fiat values.
Cost basis is configured.
To download the report:
Click Export Report in the top-right of the Ledger or Reports screen.
Select the Pre-Sync Journal format.
Filter by time frame, wallets, or other criteria to limit the data set (smaller queries run faster).
Please keep in mind that Pre-Sync reports are resource-intensive, so the smaller the data set you can query, the quicker the report will run.
Use the Chart of Accounts Summary tab for a rolled-up view of your total debits and credits by account, and the raw_data tab for a more detailed look.
Review the report carefully and ensure there are no missing values or incorrect mappings. We recommend creating a pivot table from the resulting CSV to summarize totals by account.
9. Sync transactions
Once your data is validated, you can sync transactions directly from TRES to your accounting platform.
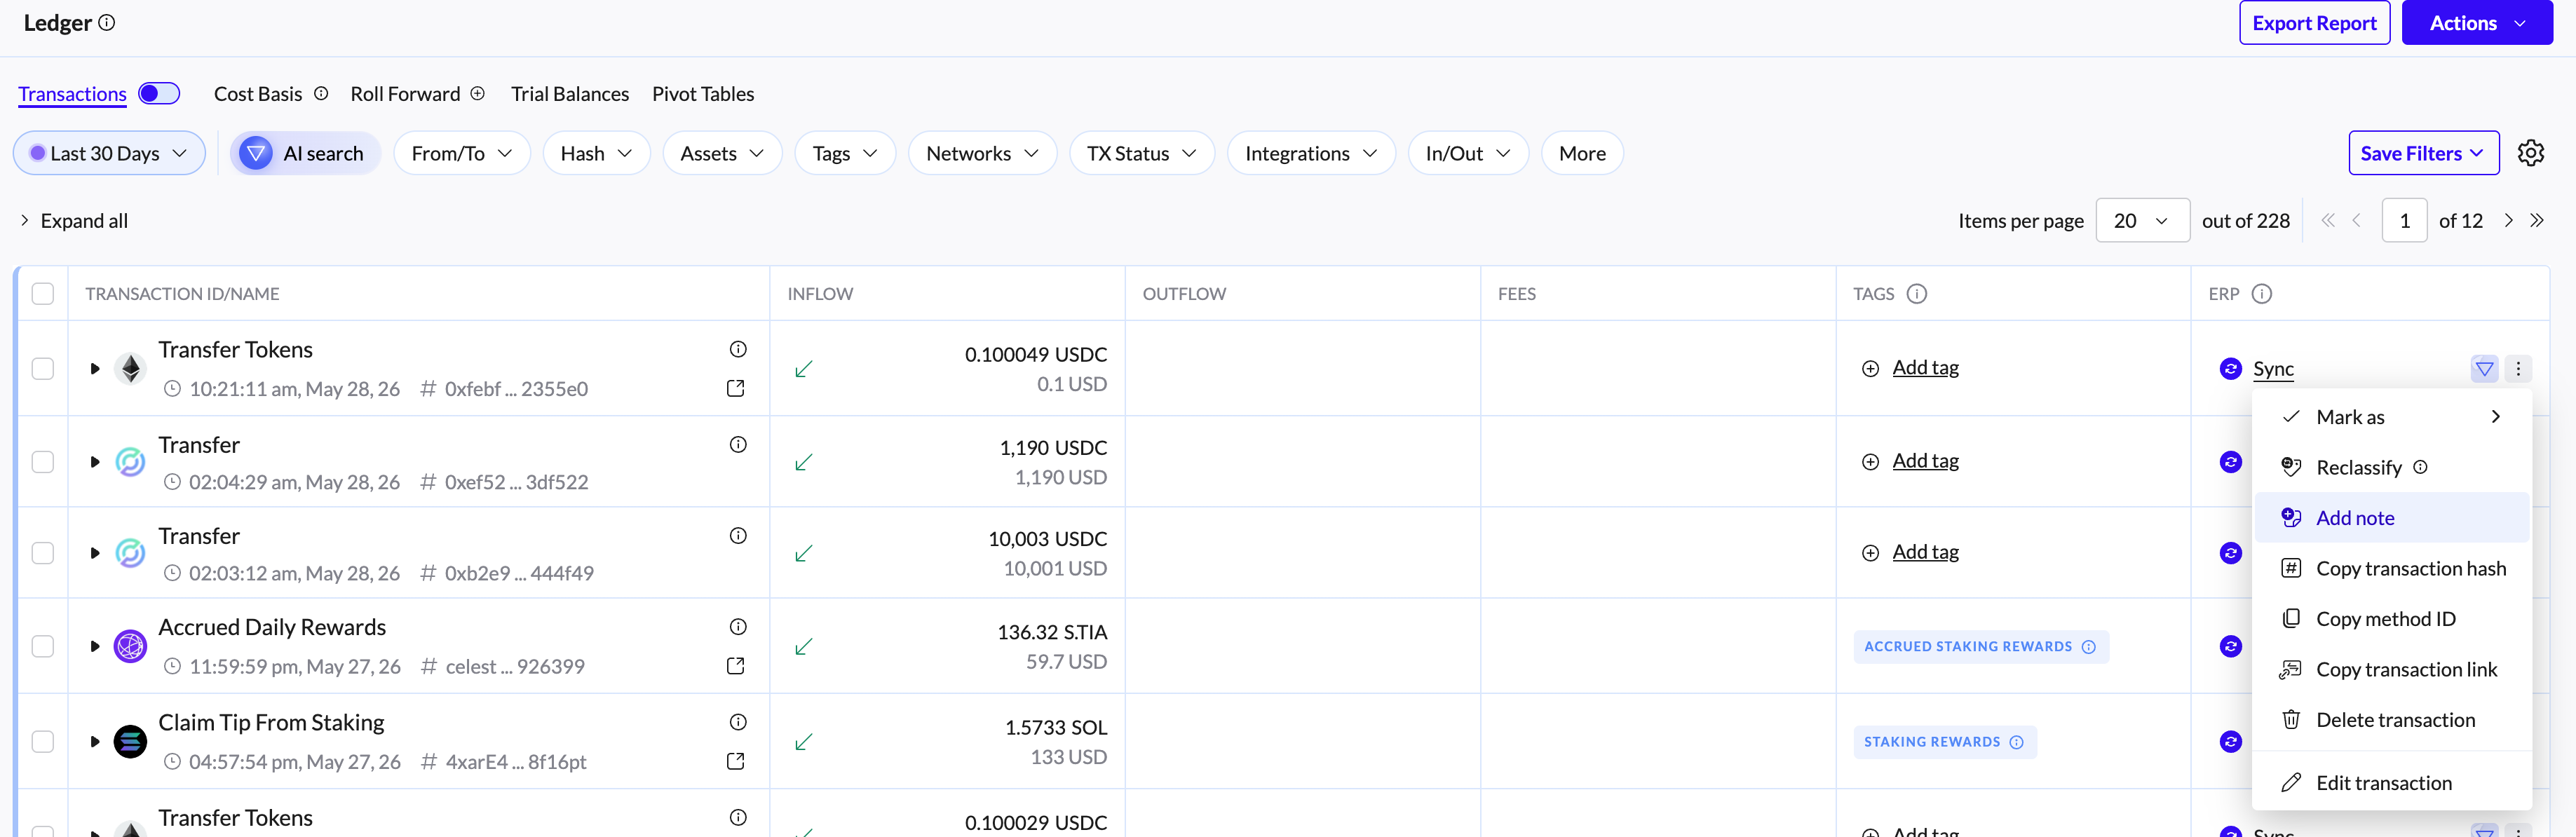
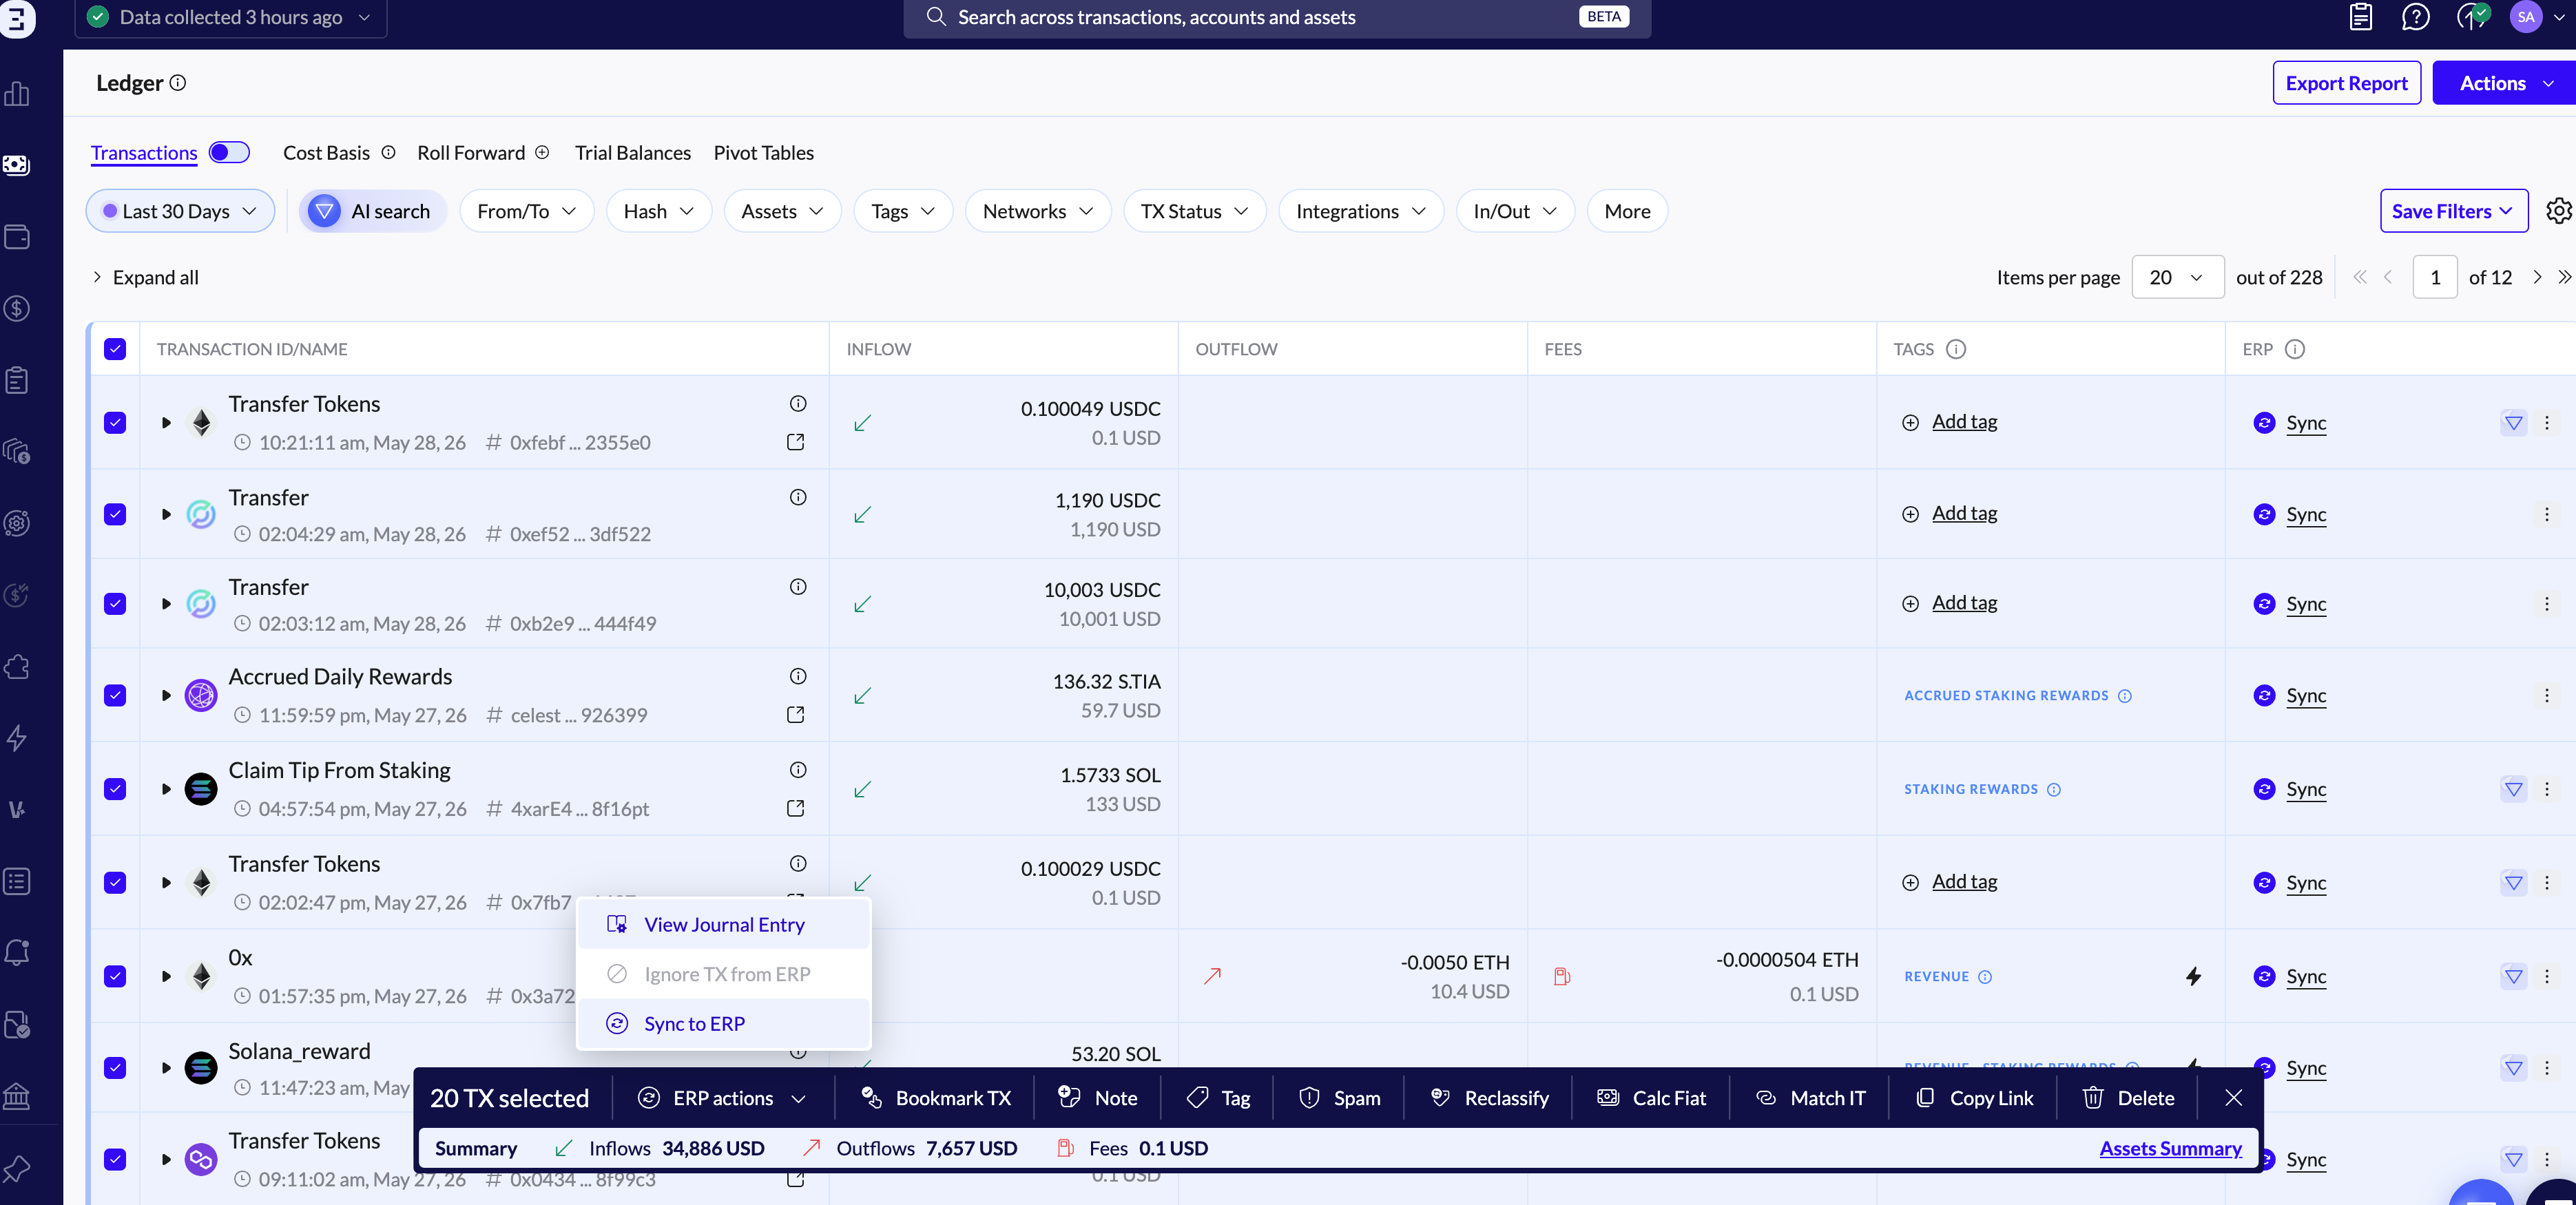
Sync individually: In the Ledger view, click the ERP icon next to a transaction to sync it manually.
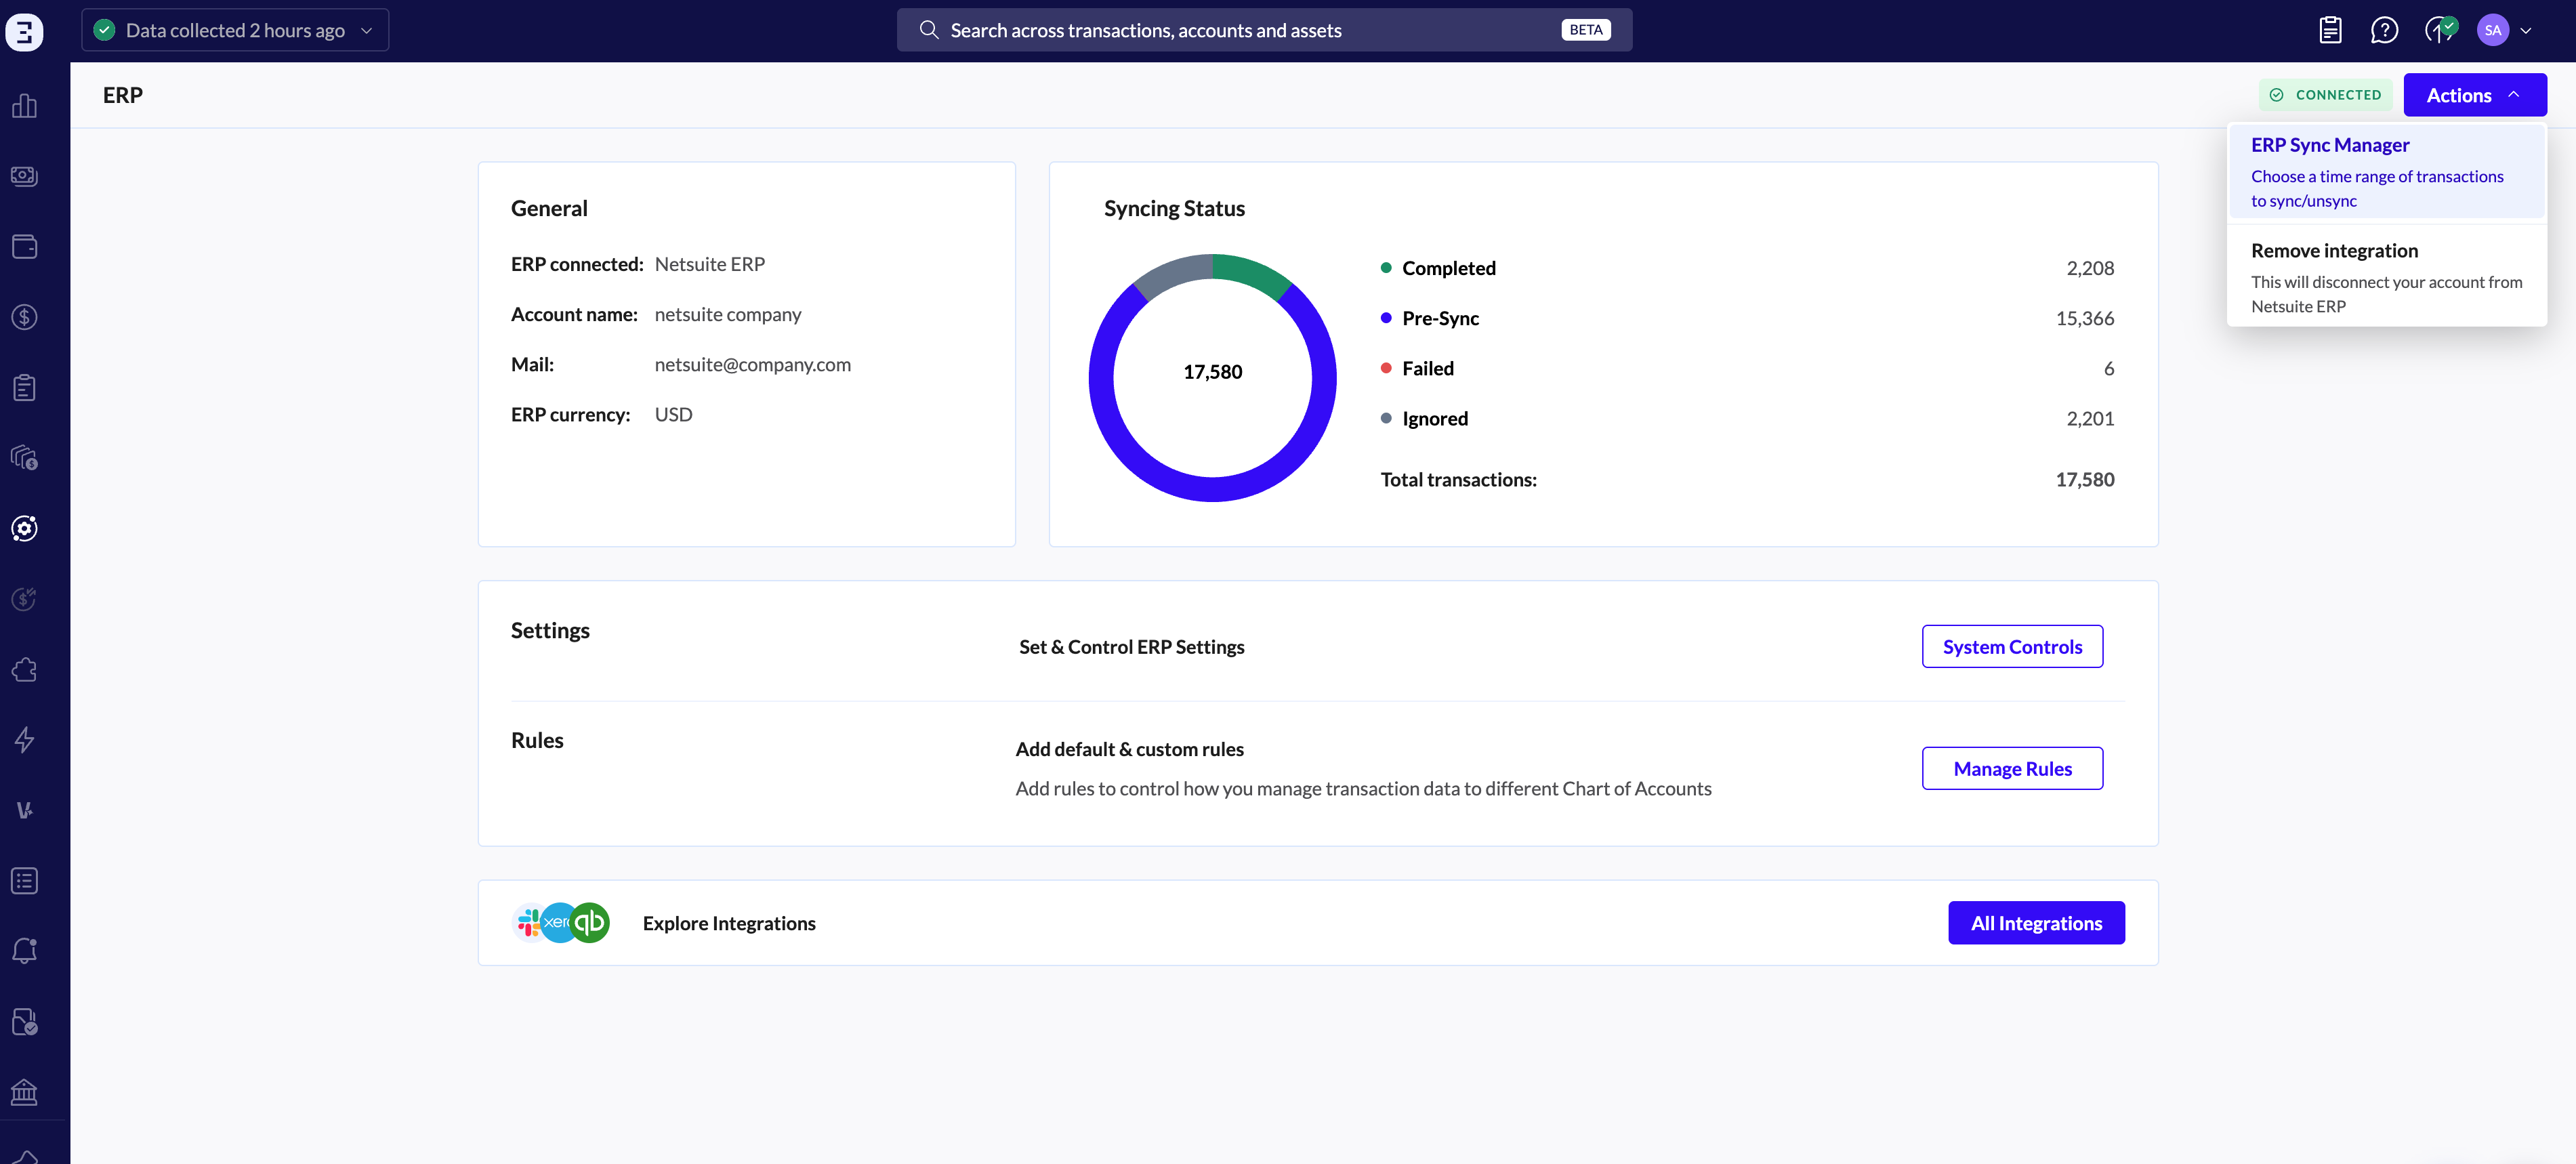
Sync in bulk: Select multiple transactions in the Ledger or in the ERP page, then click Actions in the top-right corner and choose ERP Sync Manager.
Follow the directions in Sync Transactions for best practices.
ERP page - >ERP Sync Manager
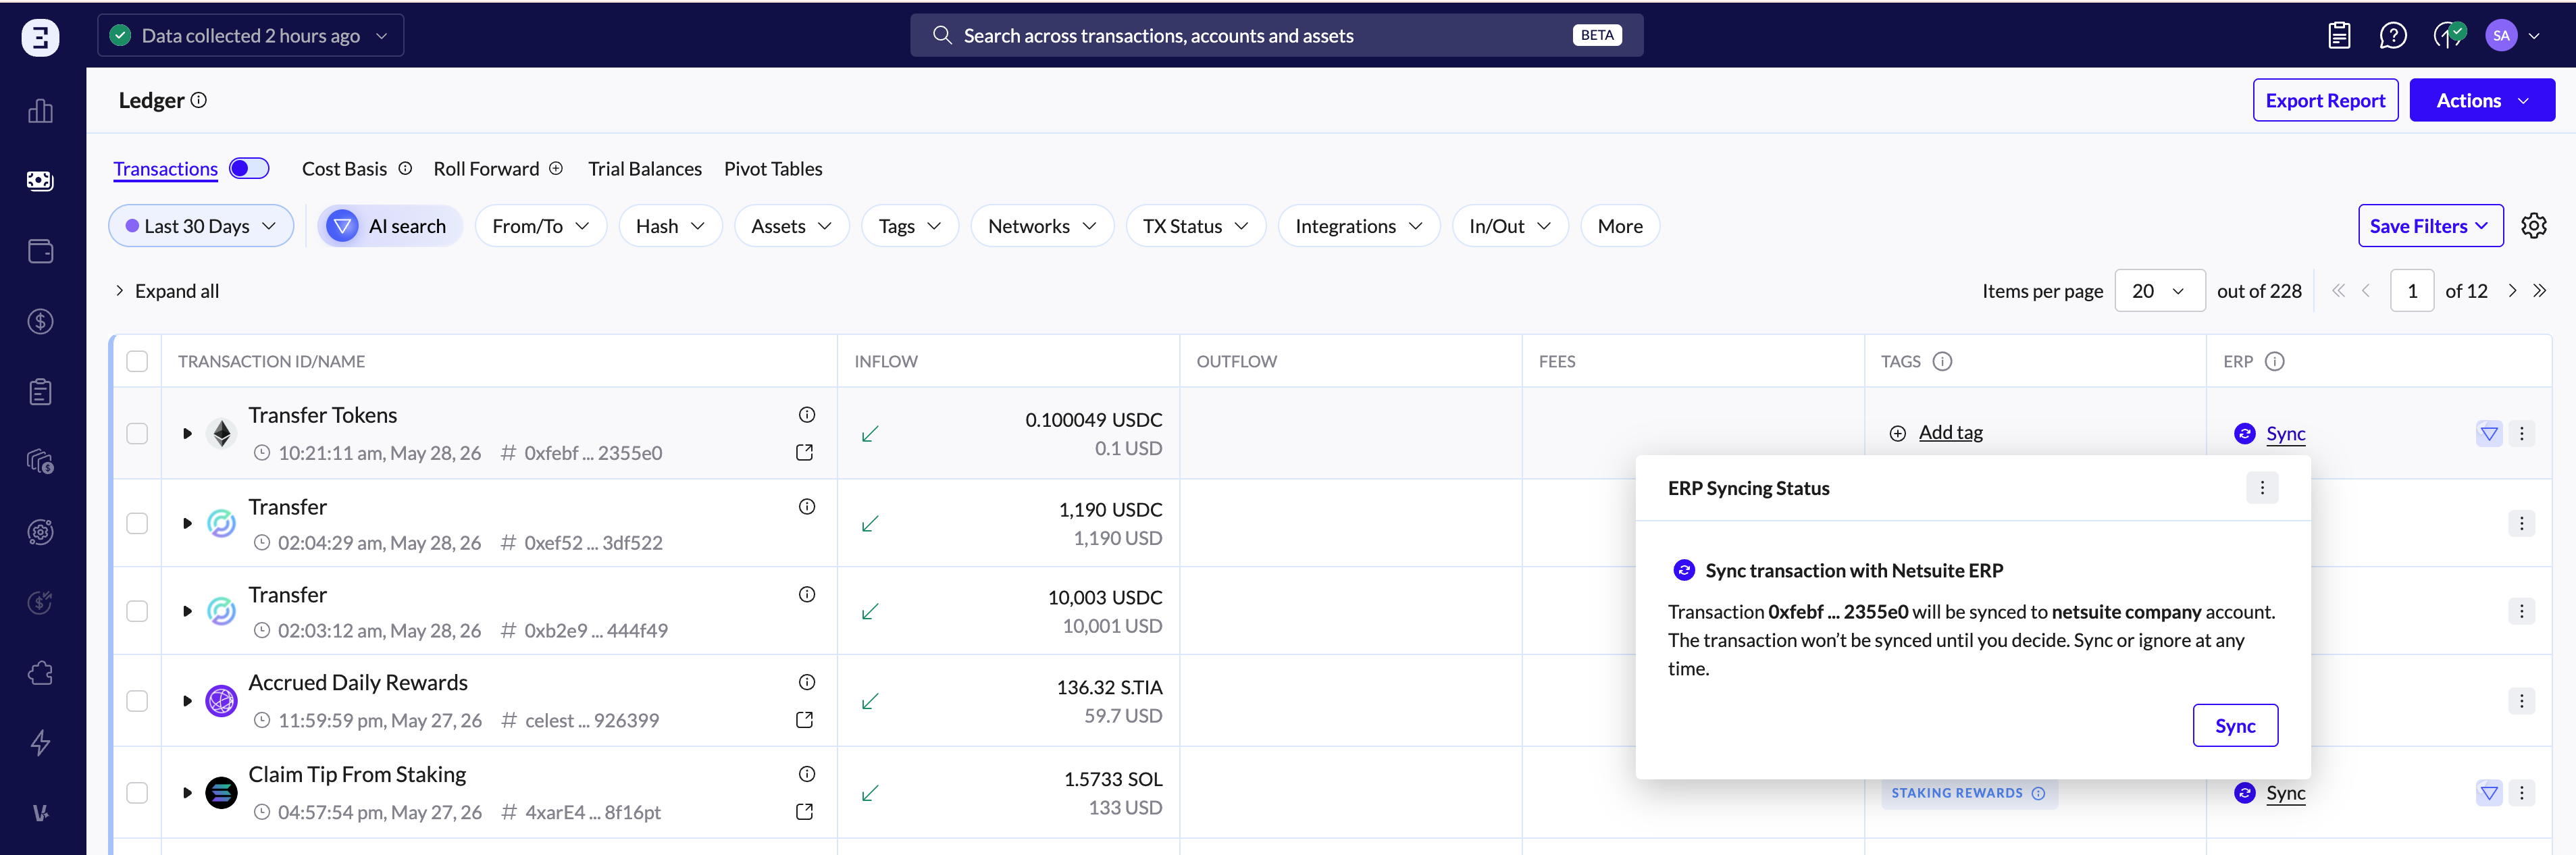
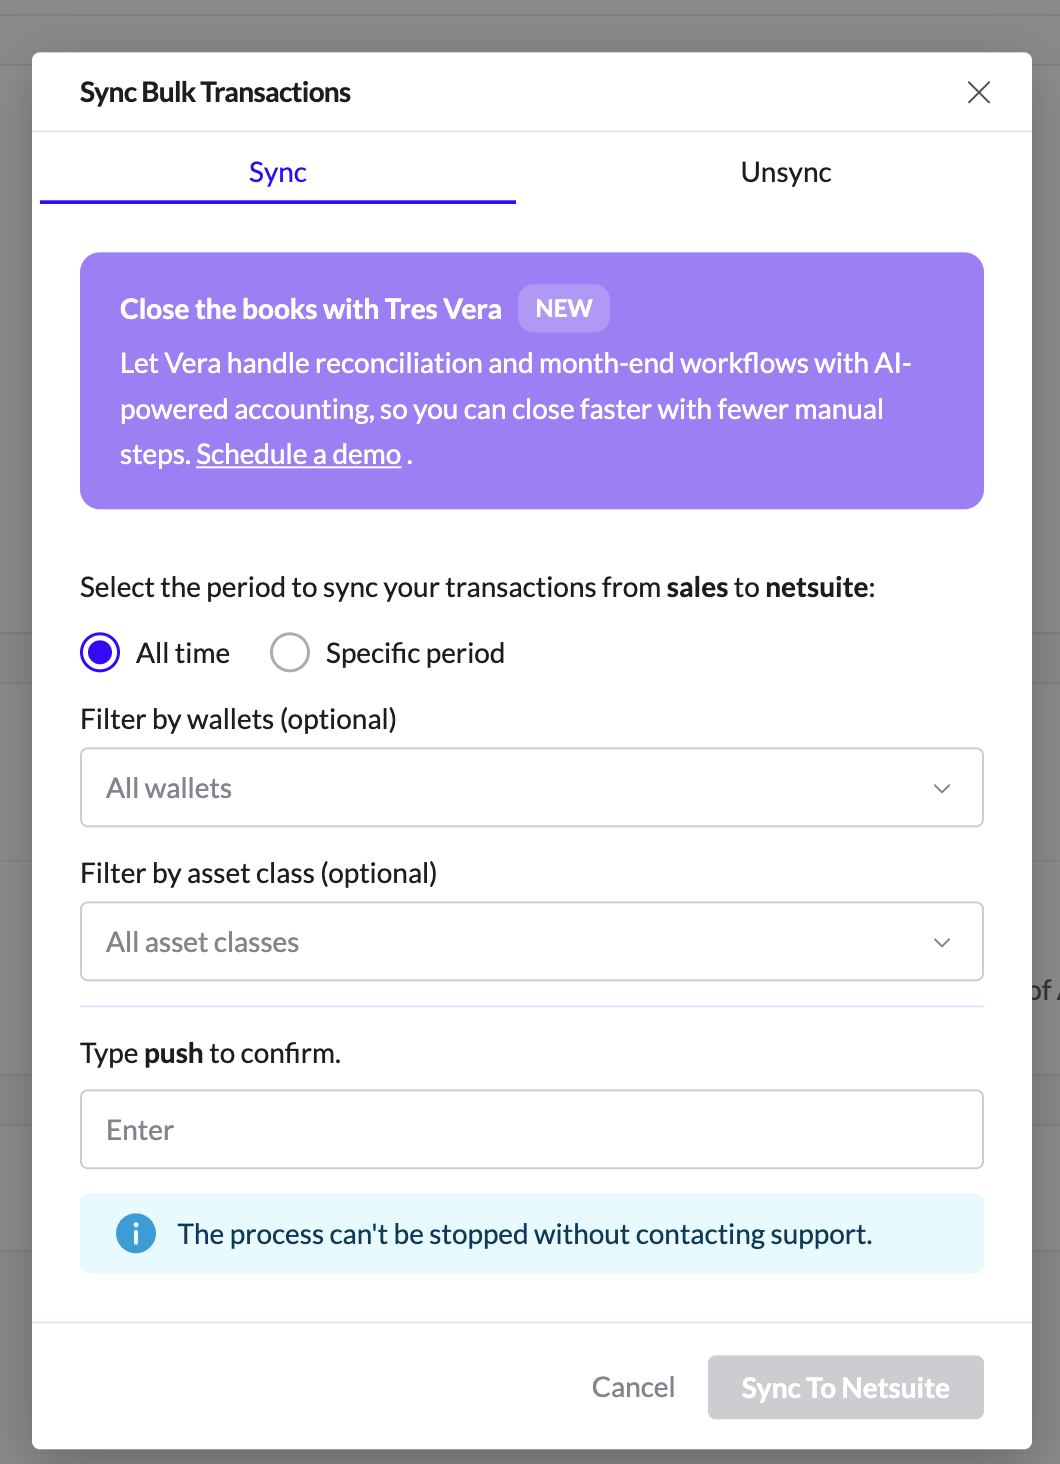
⚠️ Pay attention to syncing limitations — unsyncing transactions can delay your close process.
If you're using Universal ERP, work with the Pre-Sync report to format the data for upload to your specific ERP.
10. Final Validation (Post-Sync Report)
To confirm the sync was successful, use the Post-Sync report to see which Journal Entries actually made it through.
Download it via Export Report in the top-right of the Ledger or Reports screen.
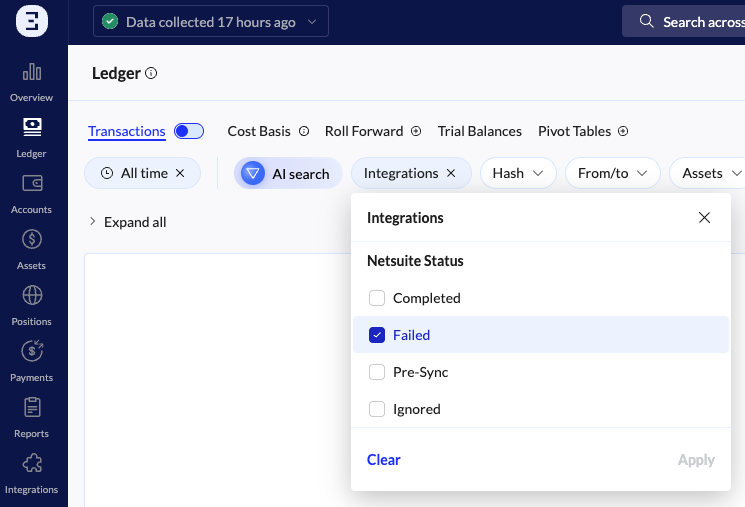
Review failed transactions directly in the Ledger using the Failed filter under Integrations.
ℹ️ The Post-Sync report is not available when using Universal ERP.
You're All Set 🎉
Once you've completed all phases, your TRES account is fully configured to automate the reconciliation, fiat valuation, cost-basis calculation, ERP classification, and syncing of your organization's transactions.
Recommended next steps:
Schedule recurring reports — set up automated Asset Balance report, or other reports from the Reports page to streamline your month-end close. See Generating recurring reports article.
Set up rollups for high-frequency transactions (e.g., hourly staking rewards) to keep your ledger manageable. See Rollups in TRES Finance.
Stay reconciled — run reconciliation checks regularly, not just at month-end, to catch gaps early.
Review your rules quarterly — as your business grows, update your ERP rules to cover new wallets, assets, or transaction types.
Need Help?
If you get stuck at any step, our Support team is here to help. You can:
Use the in-app chat to reach Support directly
Browse related articles in the Help Center
Contact your account manager for guidance specific to your setup