Sync Transactions
The most straightforward method to classify and synchronize transactions is by individually processing them from the Ledger screen. Using this method, you must sync each transaction separately. You can automate the classification of transactions by creating custom rules.
See: Define Custom Rules.
Daily Syncing Limits per ERP
Quickbooks: Does not have a limit
Xero: Limit of 5k transactions per day
Netsuite: Does not have a limit
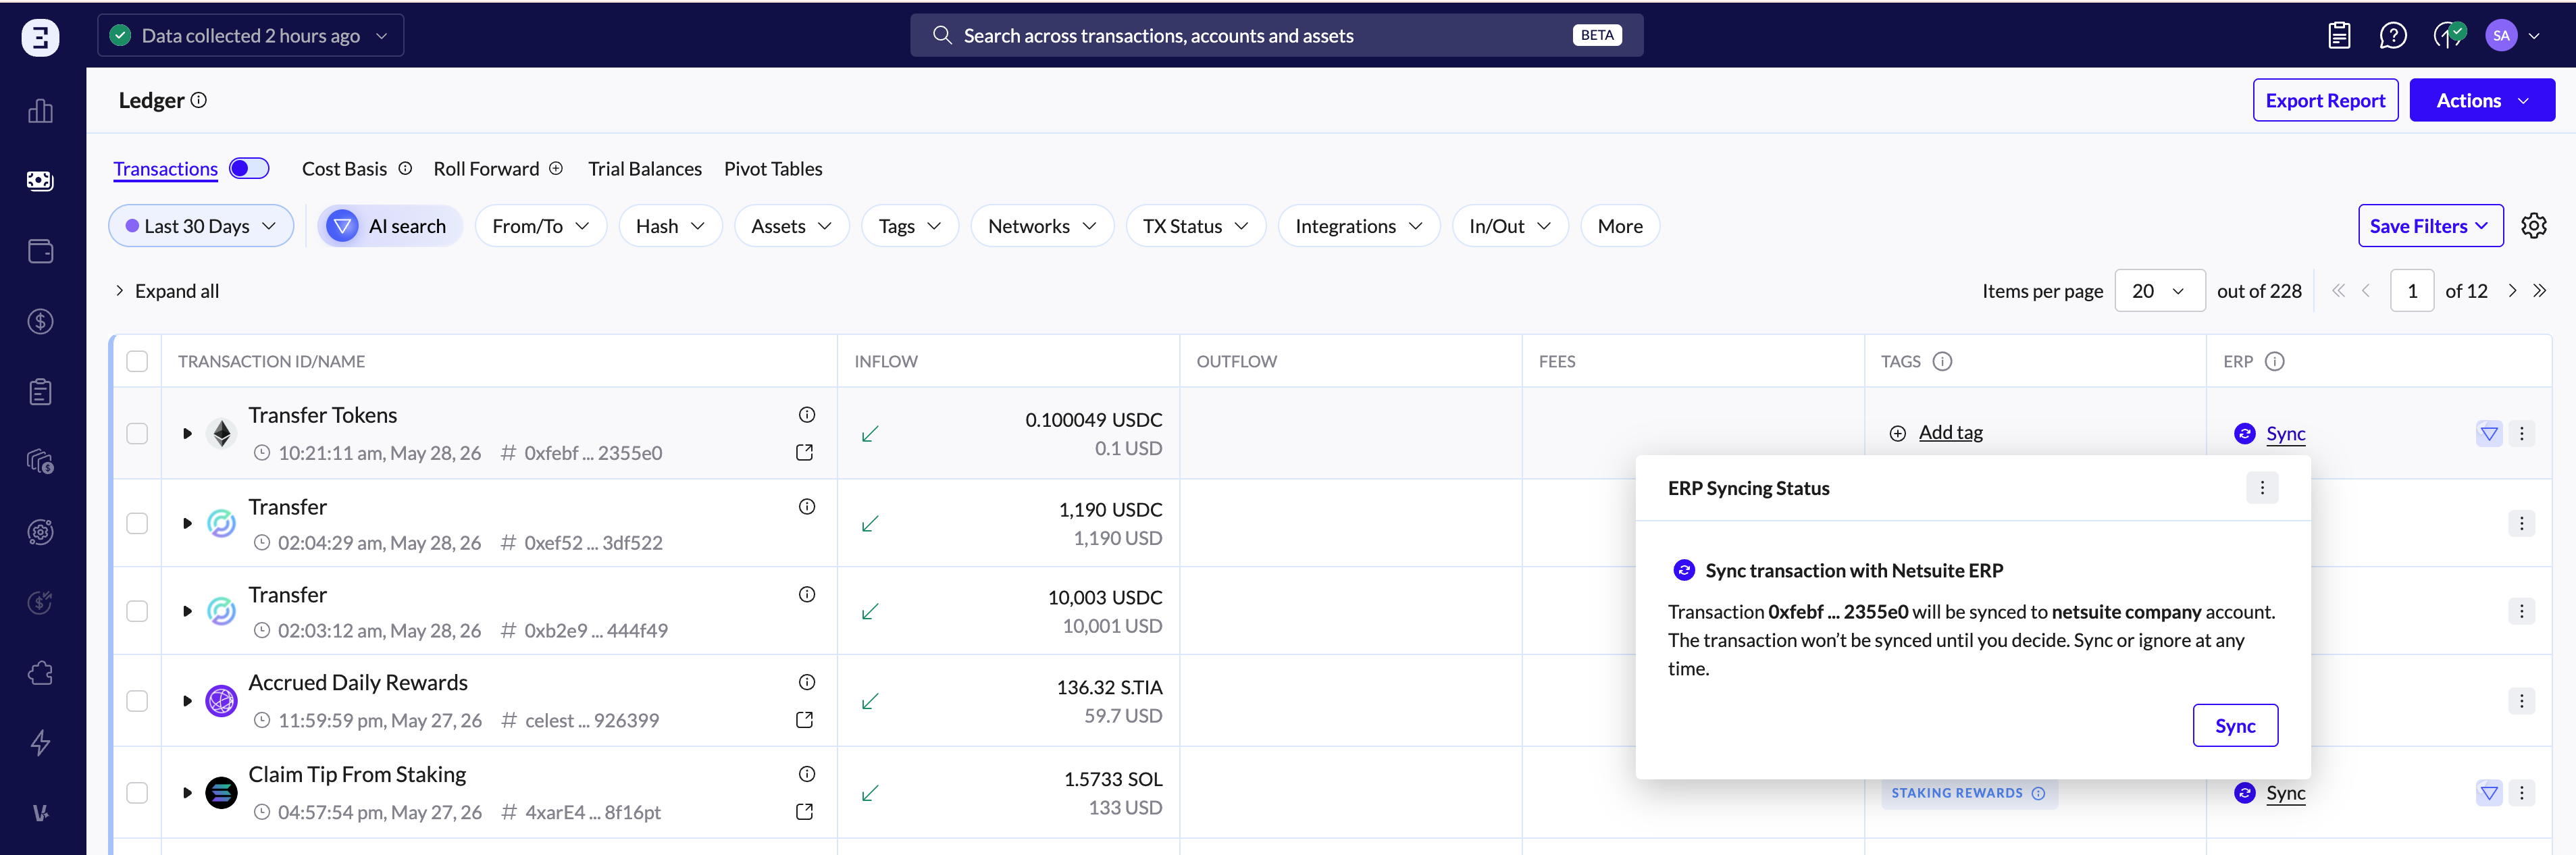
Sync individually:
In the Ledger view, click the ERP icon next to a transaction to sync it manually.
Verify the accuracy of the fiat value and cost basis calculations.
Note: If the fiat value of a sub-transaction is not present, then the transaction will not be able to be synced to the ERP system.
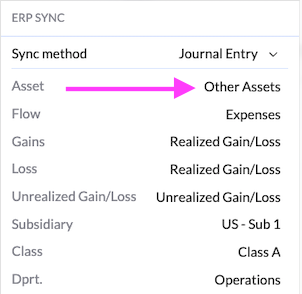
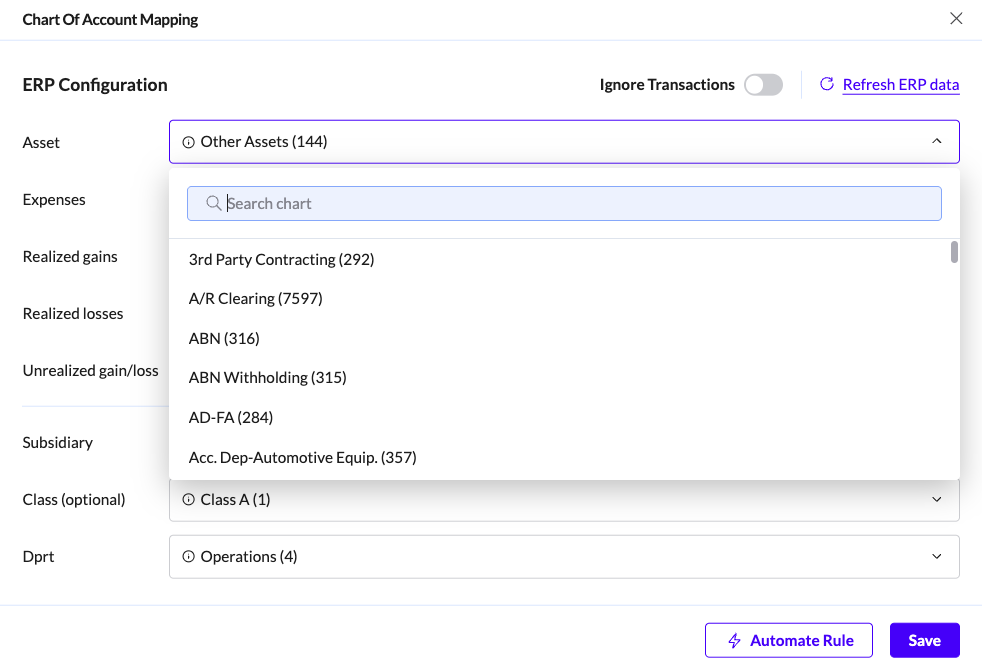
Configure the chart of accounts for each sub-transaction, specifying the asset, flow (profit, and loss), and gain/loss accounts, if they are different from the default values you set in Configure Default Chart of Account.
When you are satisfied with the settings, sync the transaction: click sync
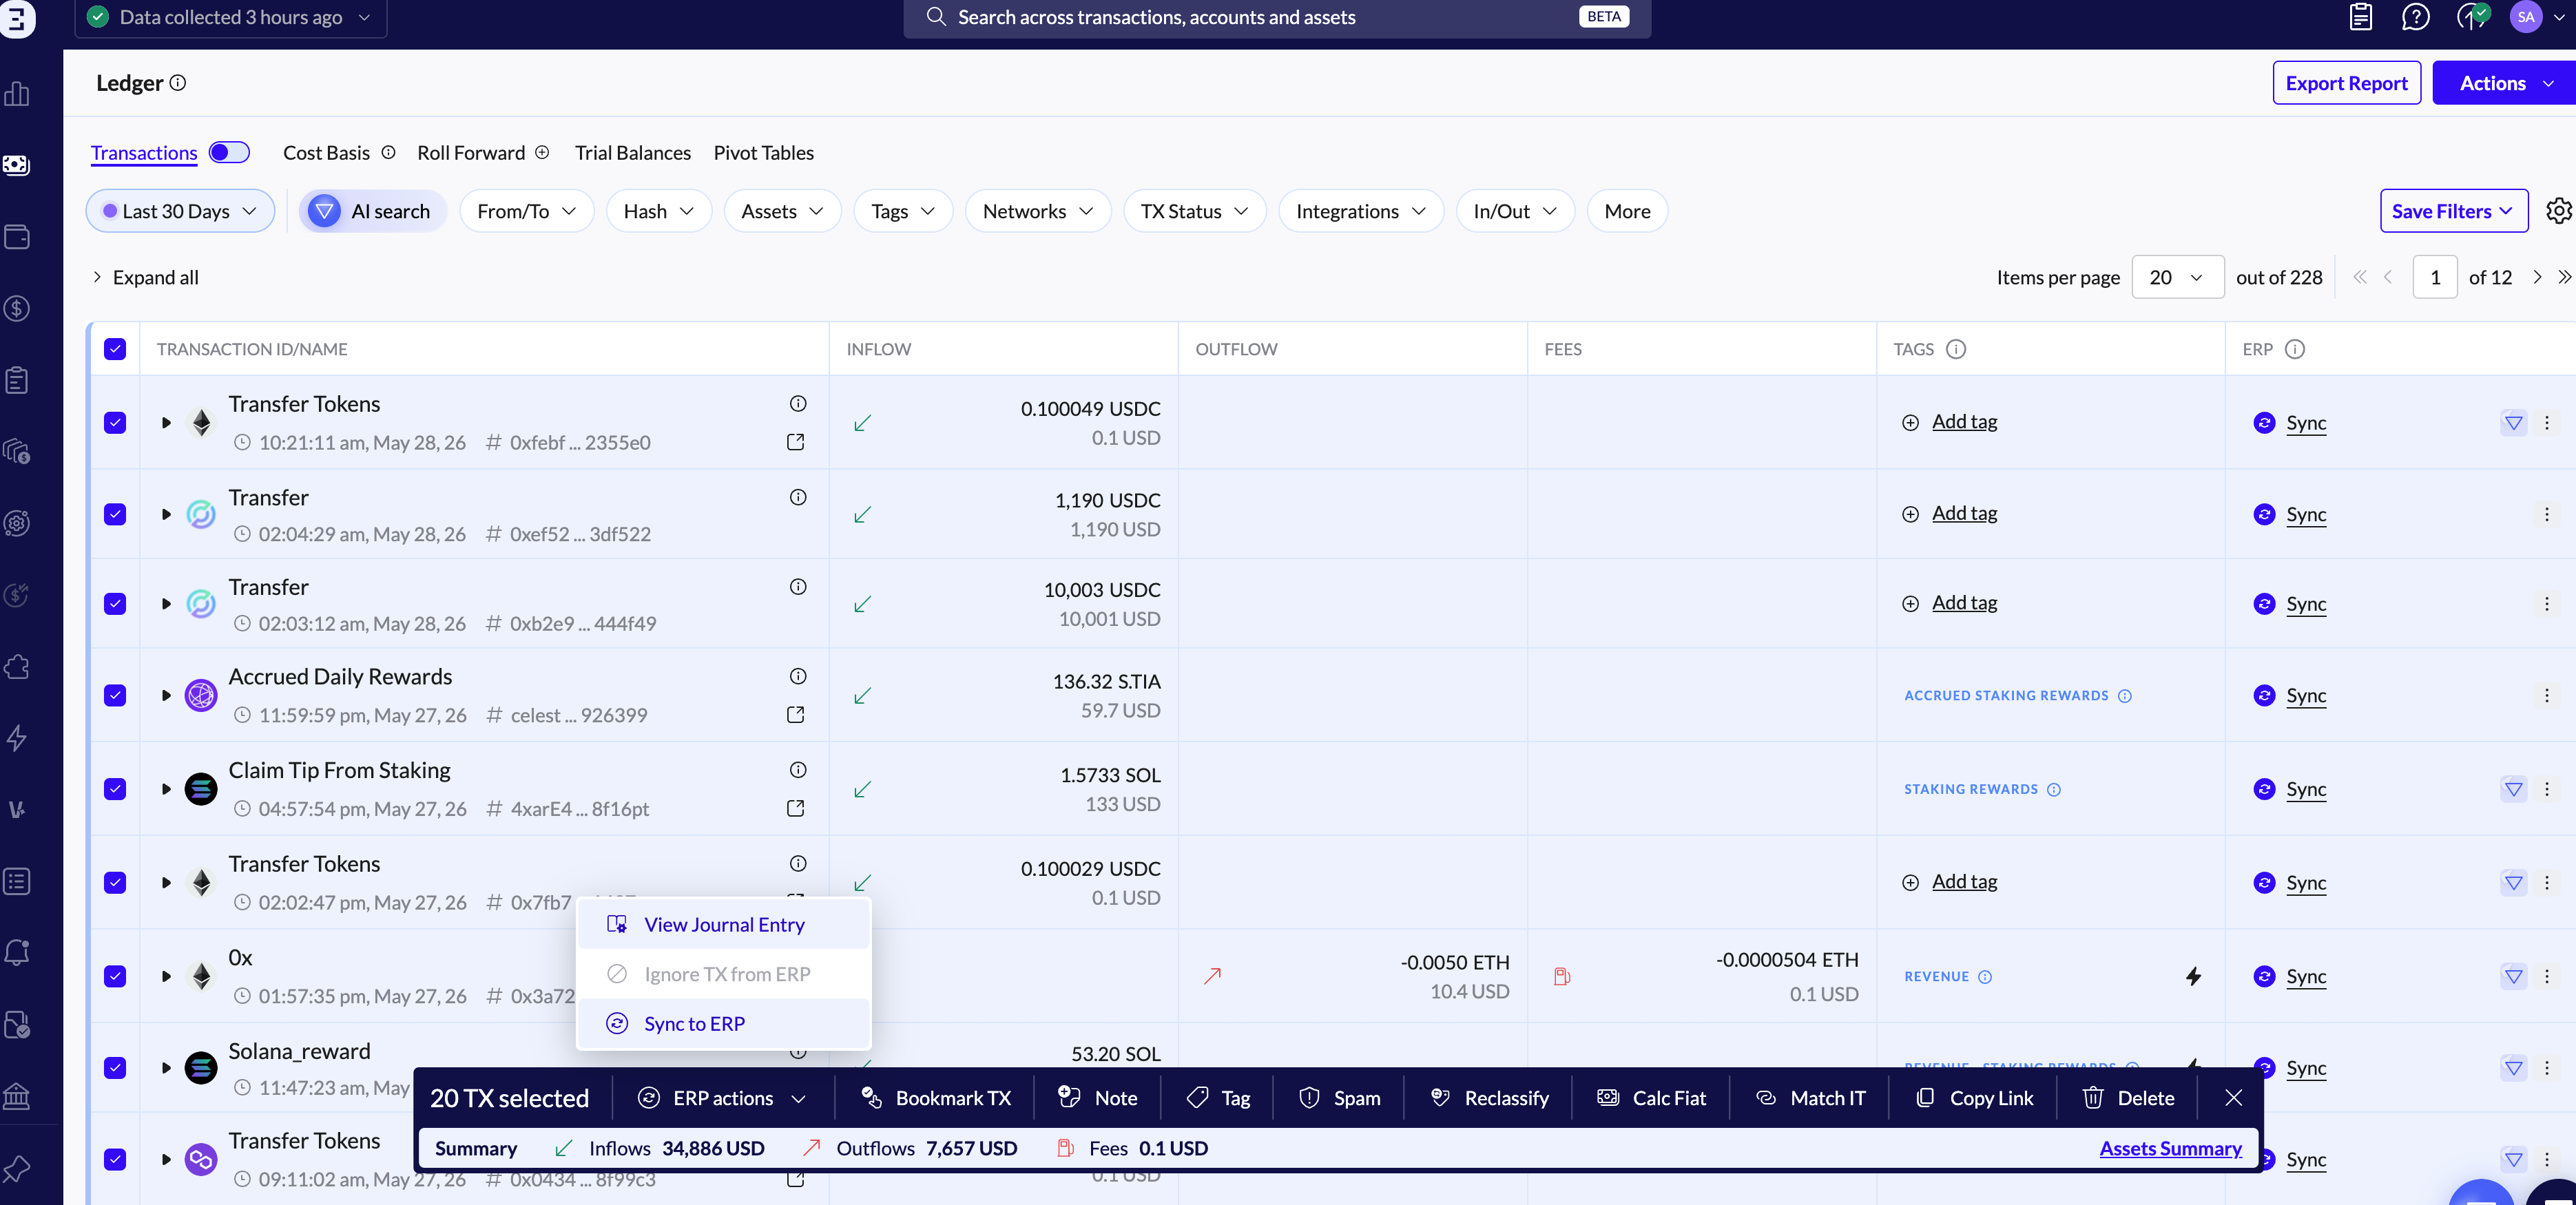
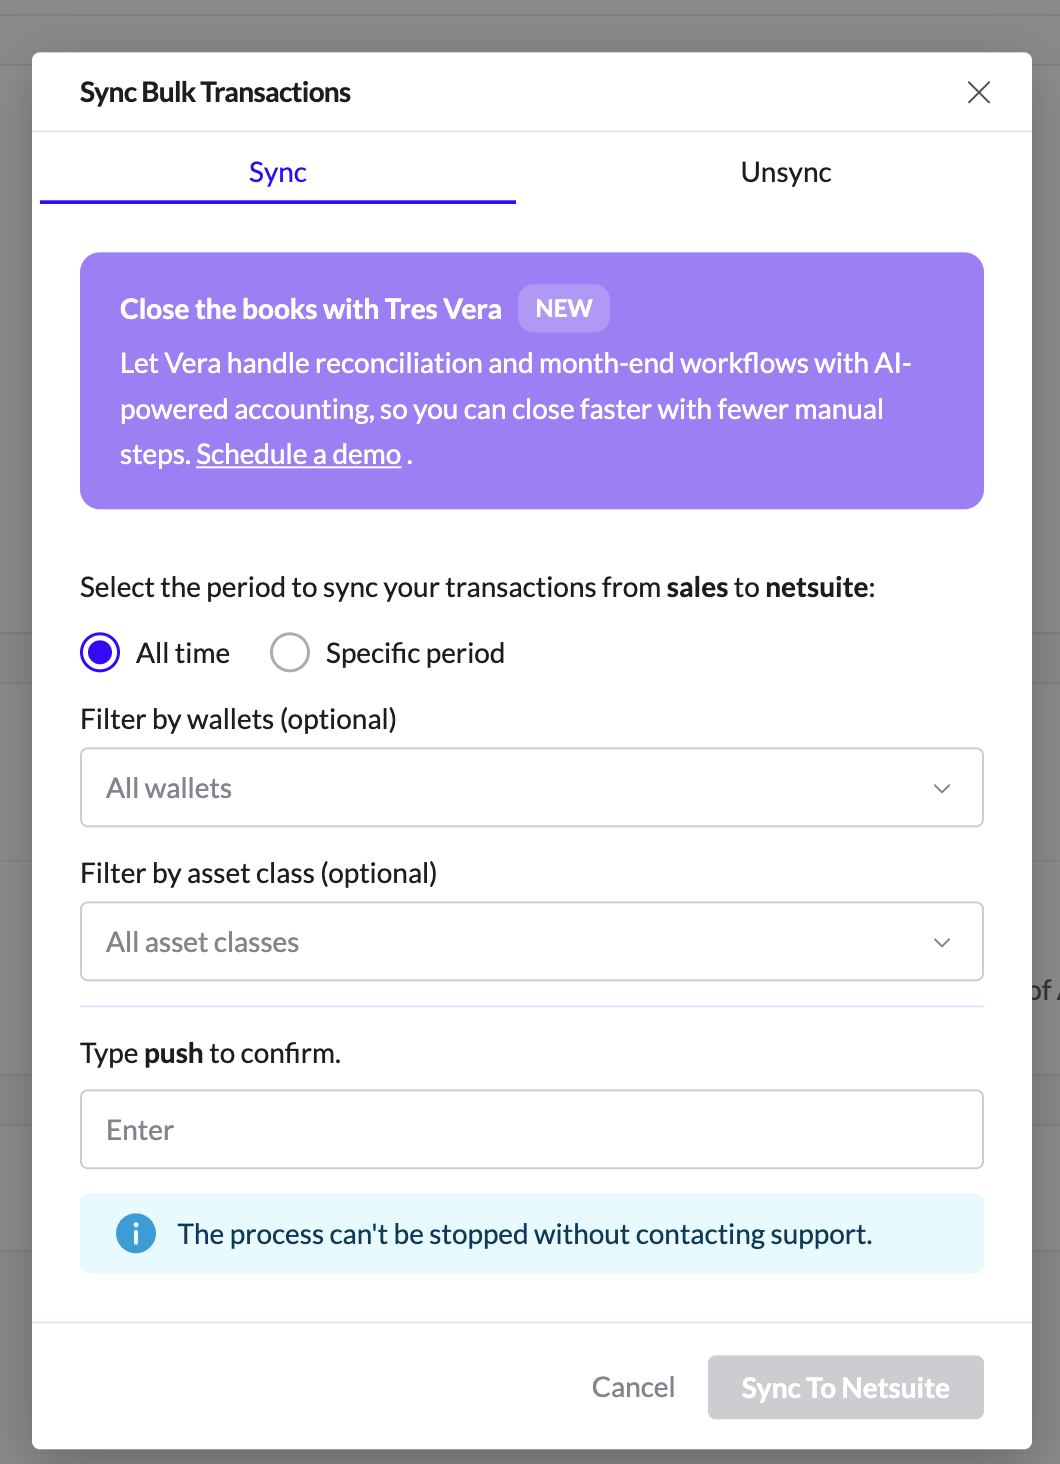
Sync in bulk:
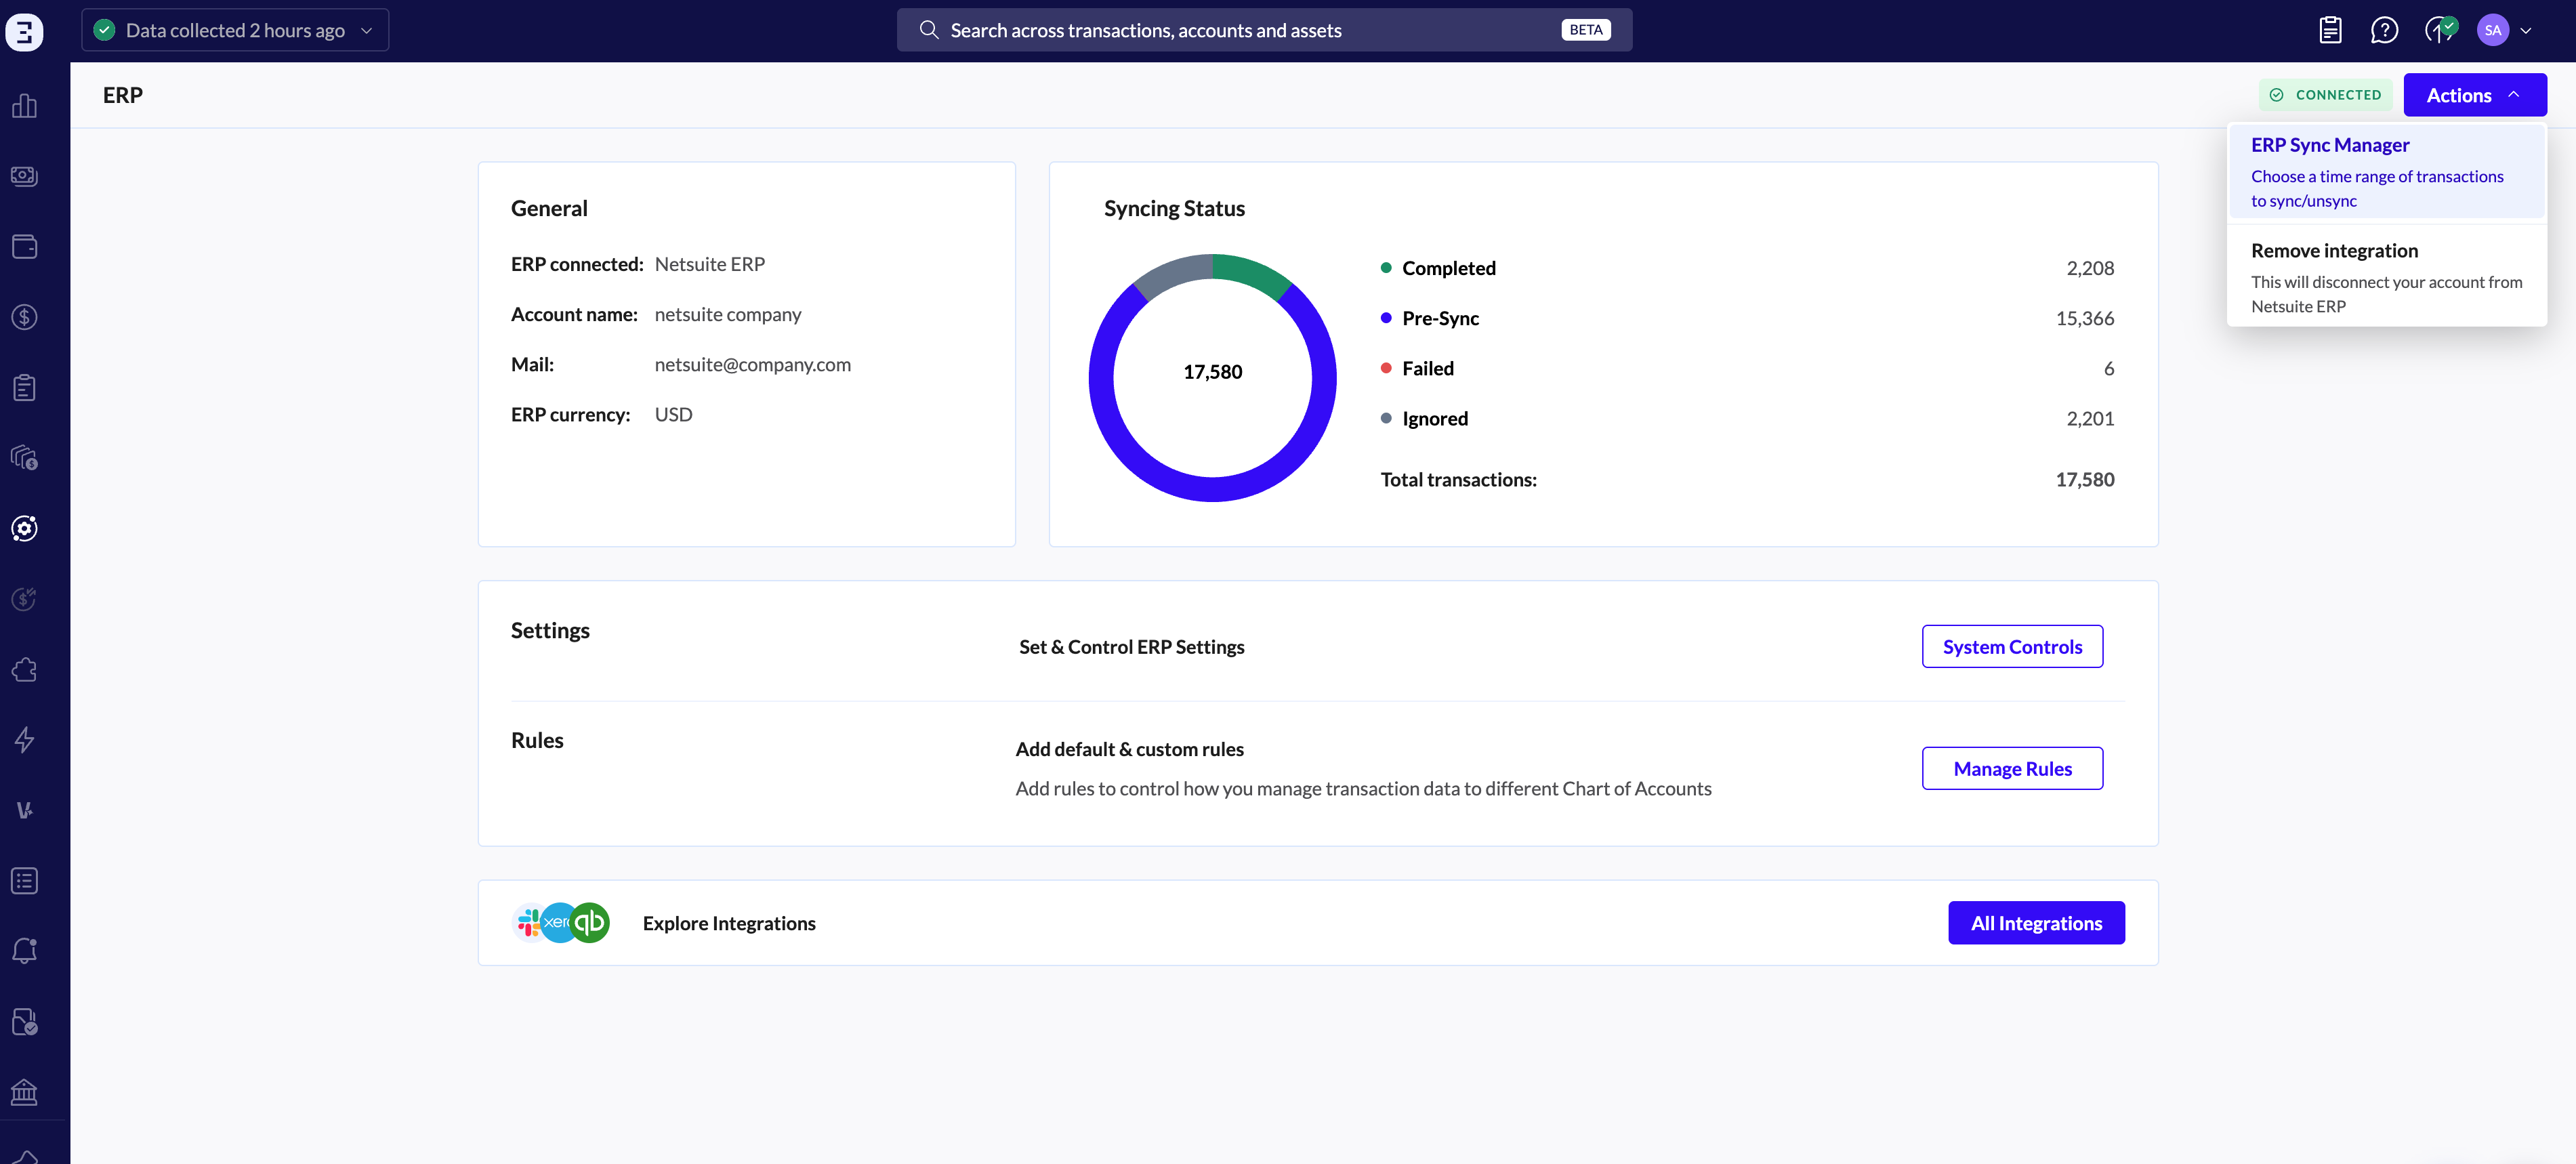
Select multiple transactions in the Ledger or in the ERP page, then click Actions in the top-right corner and choose ERP Sync Manager.
Follow the directions in Sync Transactions for best practices.
ERP page - >ERP Sync Manager
⚠️ Pay attention to syncing limitations — unsyncing transactions can delay your close process.
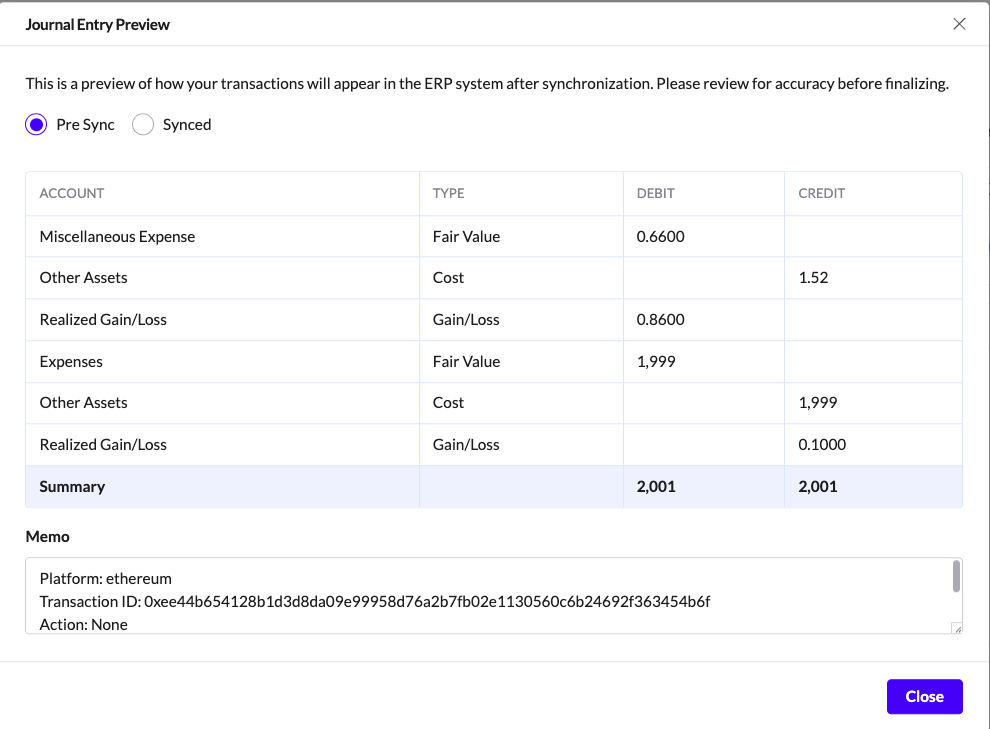
If you're using Universal ERP, work with the Pre-Sync report to format the data for upload to your specific ERP.
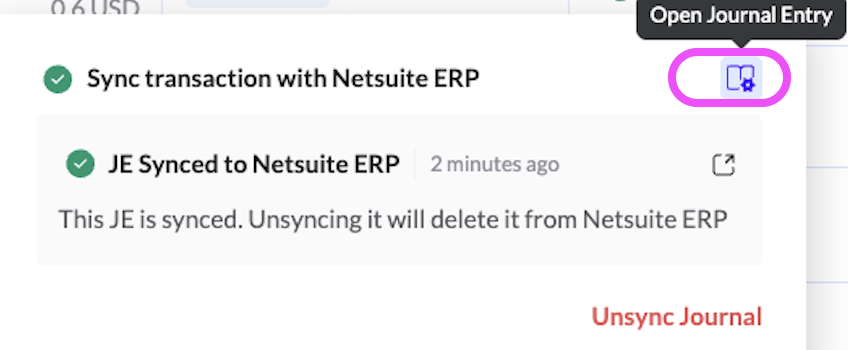
A Green checkmark indicates that the JE has synced successfully.

In addition to the basic syncing functionality, you can perform the following operations:
Access the journal entry link in your ERP by clicking the green checkmark with the ERP Icon in a synced transaction.
Review the journal entry within TRES as well as the entry that was synced to the ERP.
Unsync a previously synced transaction by clicking the same green checkmark.
Modify the chart of accounts or fiat value and resync the transaction. Click on one of the GL accounts inside of the transaction and a window will pop which will allow you to select a different account from your chart of accounts.
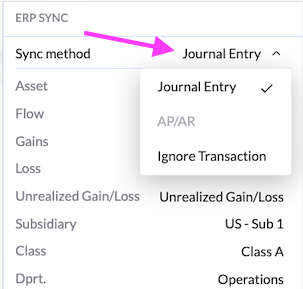
Disregard a transaction by clicking Ignore transaction. Click on the sync method in the transaction. The default is a Journal Entry and then click "Ignore Transaction"
Making Changes After A Transactions is Synced
If you want to make any changes to a transaction after it has been synced. You must unsync the transaction first. These changes include
Editing fiat value
Updating the chart of account mapping.
Adding notes
Editing or adding a Transaction tag
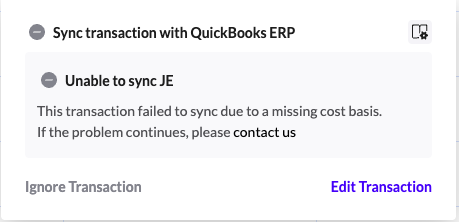
Unable to sync
If a transaction has this written next to it in the ERP section

Click where it says "Unable to Sync" an explanation will pop as to why the transaction was not able to be synced. Below you can see that there is a cost basis error but there can be a few other reasons why a JE can not be synced.