Tres Invoicing
TRES provides a unified invoicing workflow that connects your ERP, your crypto wallets, and your clients — enabling creation, delivery, tracking, and reconciliation of invoices paid in fiat or crypto.
With this launch, finance teams can now:
Automatically pull ERP-generated invoices into TRES
Send branded invoices offering both fiat and crypto payment methods
Let customers make test payments before large transfers
Receive real-time notifications upon test or full payments
Maintain complete audit-ready payment logs (including test transfers)
Automatically match invoice payments to blockchain transactions
Sync payment status back into the ERP system
Invoice table
Field | Description |
|---|---|
Invoice ID | Internal reference ID |
Customer Name | Pulled from the ERP |
Date Created | Invoice creation date |
Due Date | Payment due date |
Original Invoice Amount | Full invoice amount from ERP |
Amount Left | Updates if the invoice is unpaid or partially paid |
Billing Status | Paid / Partially Paid / Open |
Test Payment Status | Empty / Crypto payment made |
Acceptance Status | Empty / Approved / Rejected |
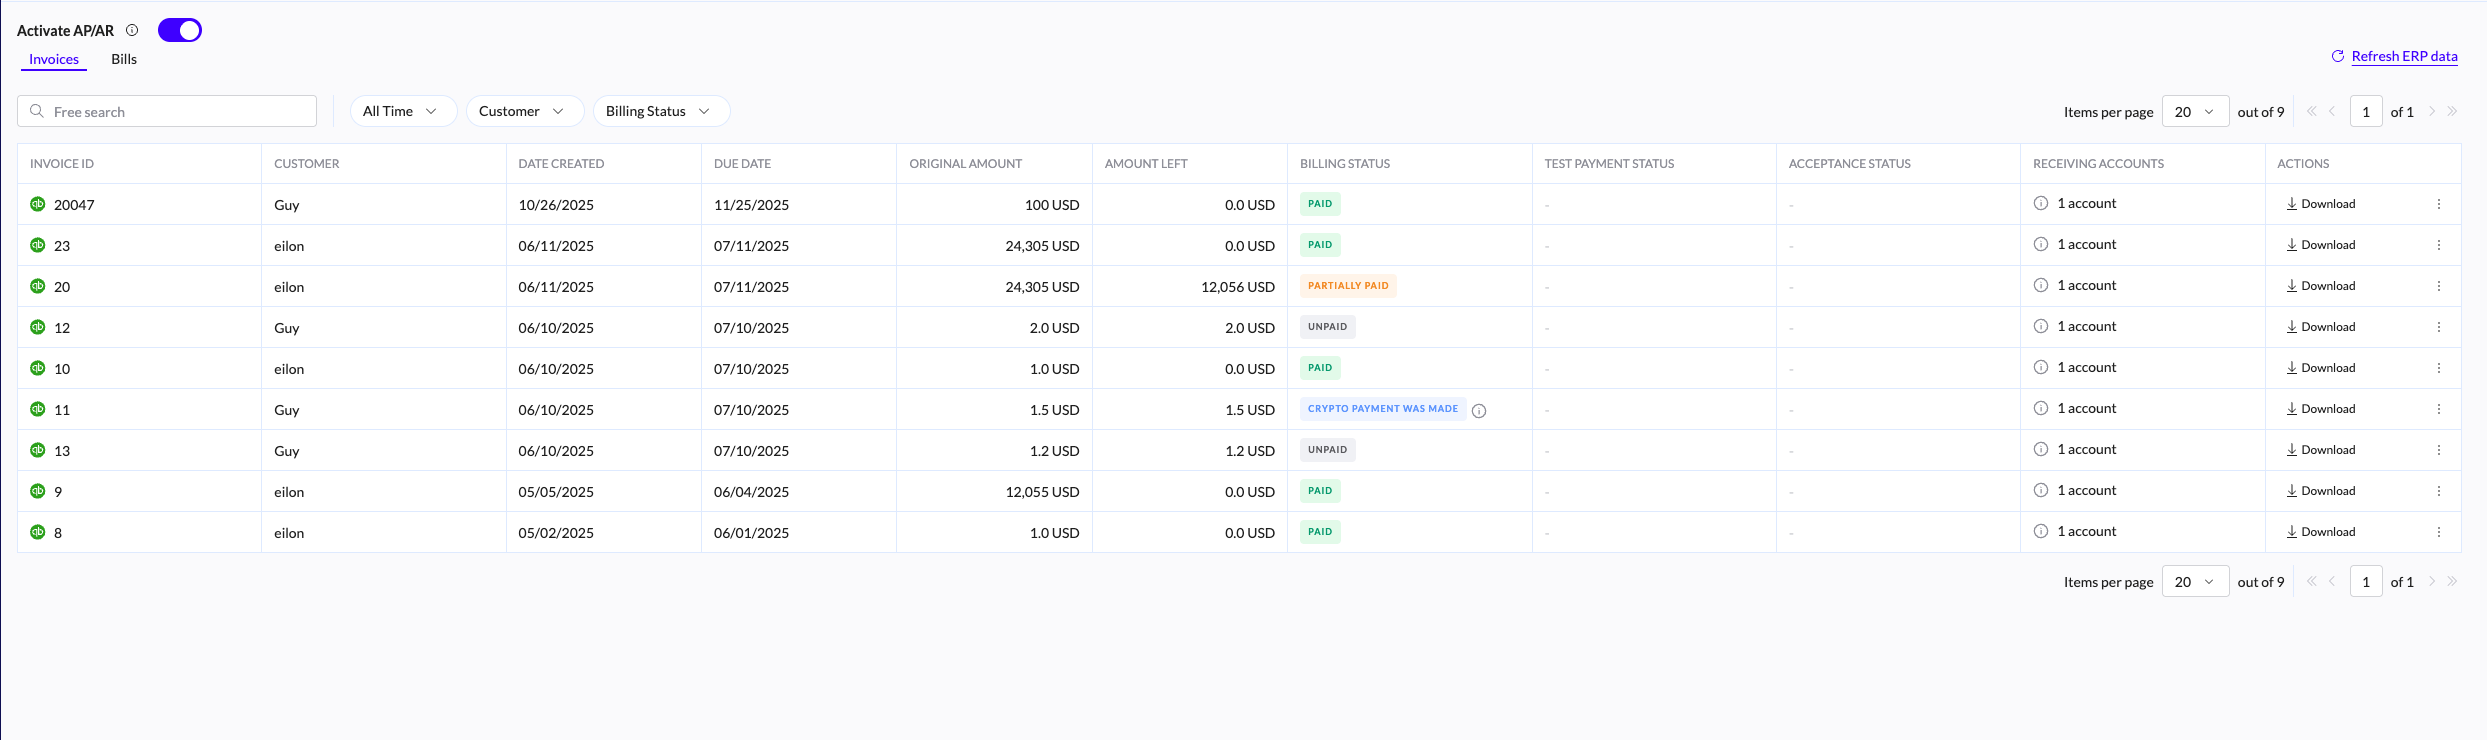
Billing Status:
Paid — Invoice fully paid, linked to a transaction, and synced to ERP
Partially Paid — Payment recorded, but not for the full amount
Open — No payment linked yet
Test Payment Status:
Empty — No test payment made
Awaiting approval - Sender needs to approve test payment
Acceptance Status:
Empty — No interaction yet
Approved — Recipient acknowledged the invoice
Rejected — Recipient actively declined the invoice
How Tres invoicing works
Connect ERP - Connect your ERP account (e.g. Xero, NetSuite) to TRES.
All AP/AR invoices are automatically imported.View Invoices - Go to Integrations → AP/AR to access the full invoice list.
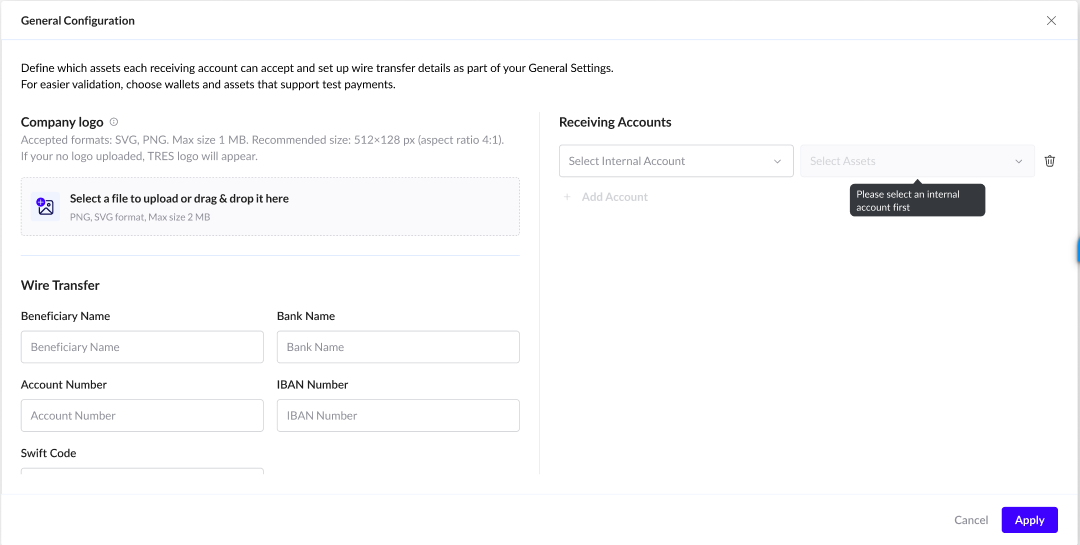
Configure Invoice Defaults - Click General Configuration (top left) to set:
Brand logo that appears in client-facing invoices
Internal payment accounts and supported crypto assets
Wire instructions for fiat payment options
(These settings act as the default for all invoices, but can be customized per invoice)
Preview an Invoice - Click any invoice row to open the invoice preview.
You may:Confirm or adjust available payment accounts (crypto or bank)
Review line items before sending
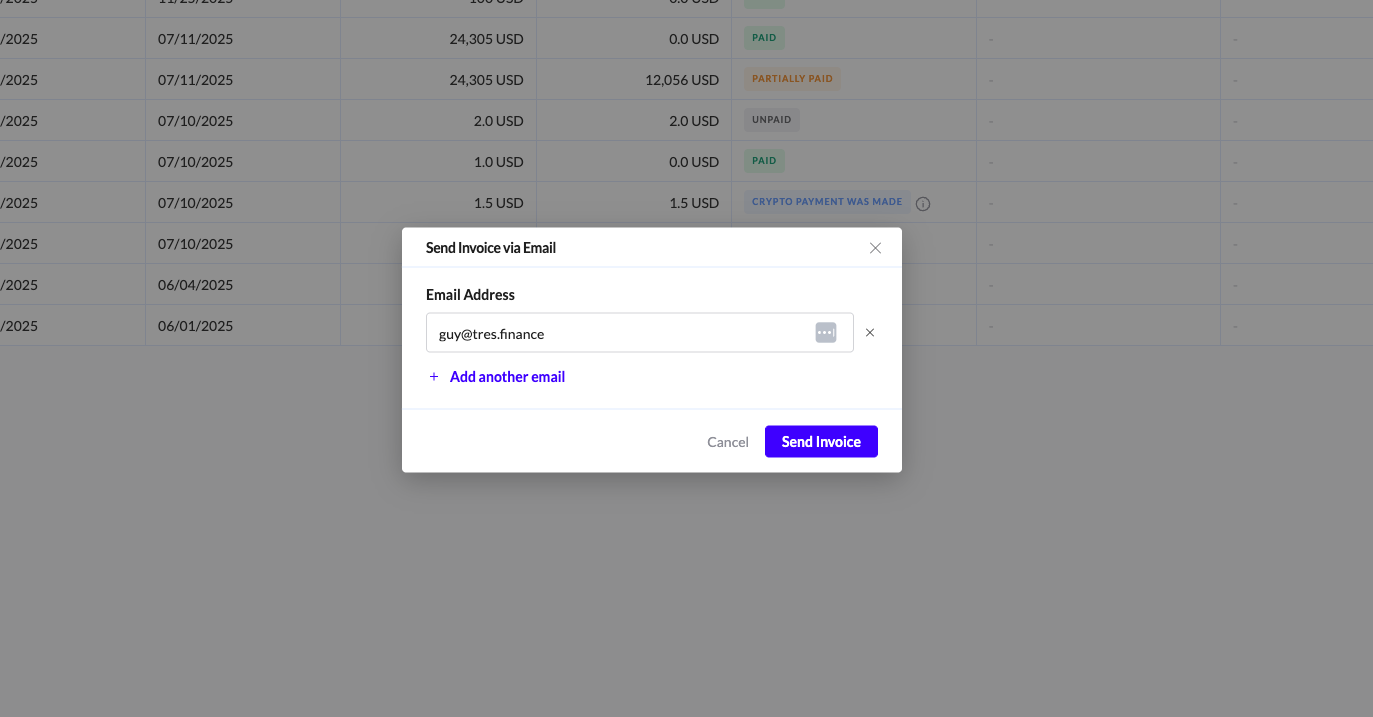
Send the Invoice -
From the invoice table, open the ⋮ menu → Send Email.
Enter one or more recipient emails.
Your customer will now receive the interactive invoice.

Customer Invoice Experience (Your Clients)
After receiving the invoice email, your customer can:
Approve or Reject
This is optional but helps you track engagement:
Approve → confirms they received and accept the amount
Reject → signals a dispute or need for clarification
Approval does not trigger payment.
Make a Test Payment (Optional)
Useful for first-time or large crypto transfers.
A small amount (≈ $1) is generated
Customer sends it to the selected crypto address
TRES detects the transfer and logs its hash
Once approved on your side, the customer can proceed
You receive a notification as soon as the test payment arrives.
Make Full Payment
When the full crypto payment is made:
The invoice status changes to: Crypto payment made
A transaction hash is recorded
The transaction becomes visible in the Ledger (after data collection sync)
The invoice is automatically linked to that transaction
Sync Back to ERP (Invoice sender)
Once payment is final, sender:
Validates that the transaction matches the invoice
Syncs to the ERP